What is DIY Rubber Surfacing in Denver and Why Choose It?
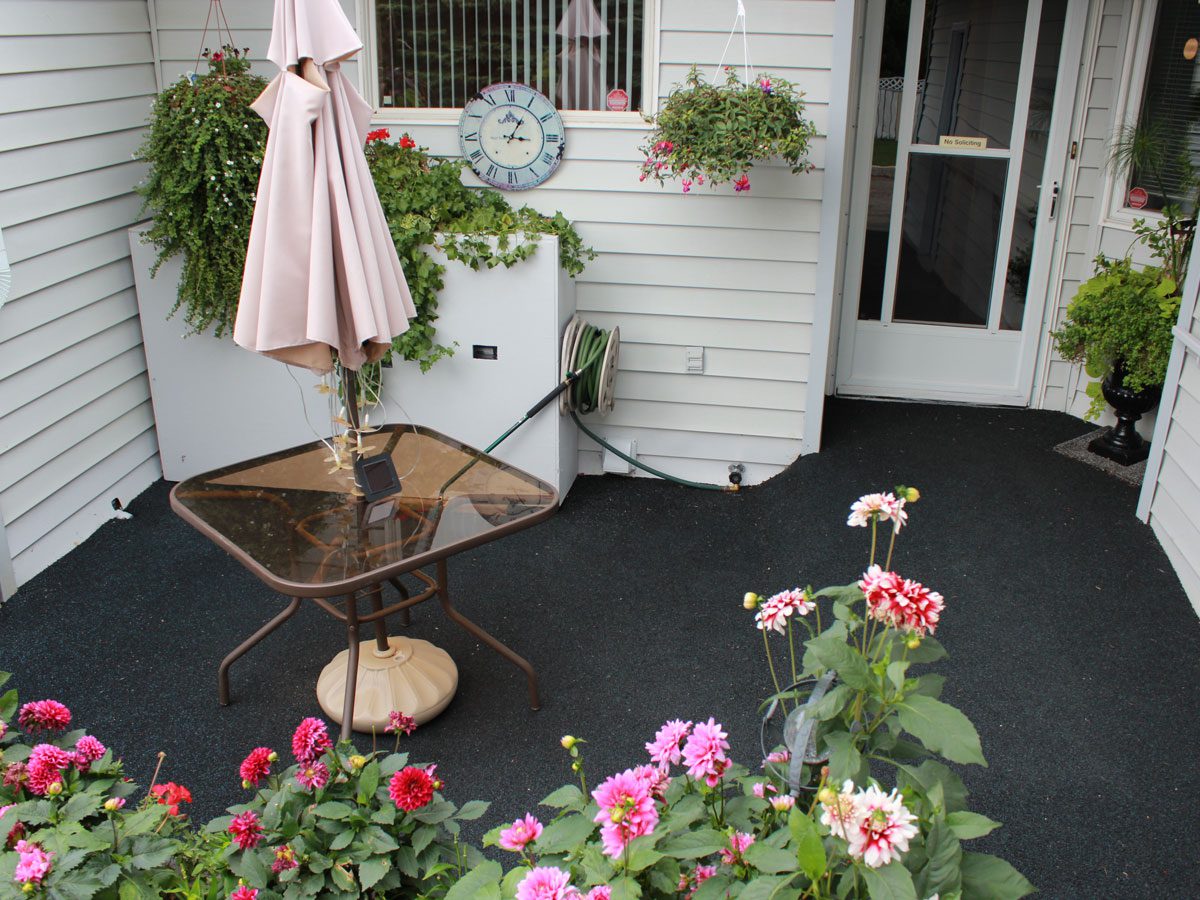
Taking on a diy rubber surfacing denver project is one of the best ways to transform a cracked concrete patio, driveway, or playground in Denver into a safe, beautiful, and sustainable surface. You do not need to hire expensive contractors to get a professional, slip-resistant finish that handles the freeze-thaw cycles of Colorado winters like a champ.
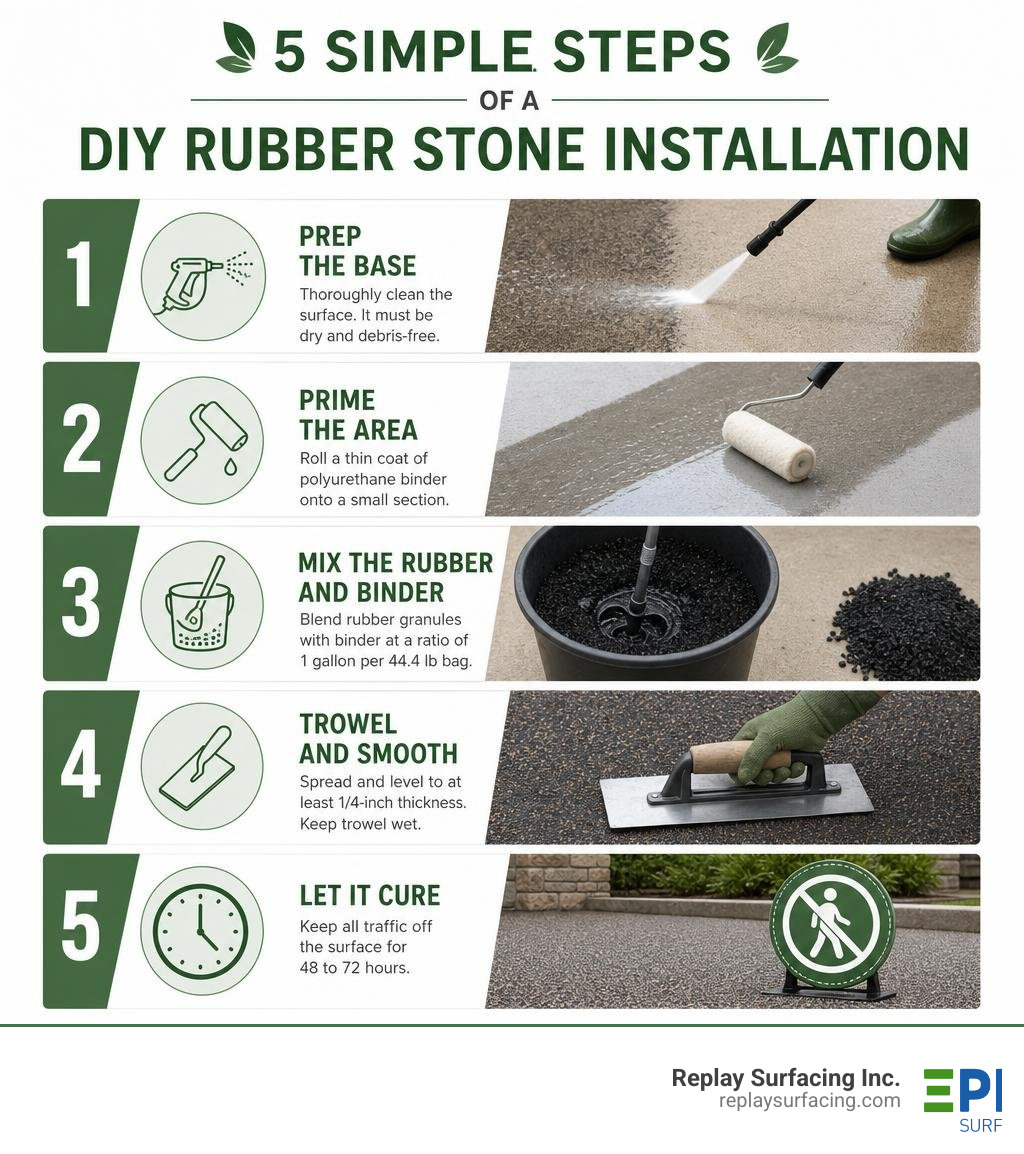
If you are looking for a quick answer on how to get started, here is the basic, step-by-step process for a successful installation:
- Prep the base: Thoroughly pressure wash your existing concrete, wood, or asphalt surface. It must be completely dry and free of debris.
- Prime the area: Roll a thin coat of polyurethane binder onto a small section of the sub-floor to ensure strong adhesion.
- Mix the rubber and binder: Blend your colored EPDM or recycled rubber granules with a high-quality polyurethane binder at a ratio of 1 gallon of binder per 44.4-pound bag.
- Trowel and smooth: Spread the mixture over your primed area, leveling it to at least a 1/4-inch thickness. Keep your trowel wet with soapy water so the rubber does not stick to it.
- Let it cure: Keep all traffic off the new surface for 48 to 72 hours while it dries.
I am Landon Olson, a mechanical engineer and MBA graduate who has spent years recycling millions of pounds of scrap tires into sustainable safety surfaces. As the operator of Replay Surfacing Inc., I love helping property owners master the art of the diy rubber surfacing denver project to create durable, eco-friendly spaces.
Similar topics to diy rubber surfacing denver:
When we talk about rubber surfacing, we are referring to a premium resurfacing material that blends the incredible flexibility of rubber with the strength of a high-performance polyurethane binding agent. Unlike rigid materials like concrete or brick pavers, rubber surfacing is designed to flex. This means that when the ground shifts—whether due to clay soils in Charlotte, North Carolina, or freeze-thaw cycles in Connecticut—your surface moves with the earth rather than cracking under the pressure.
To understand why this material is a game-changer for your home, it helps to break down its two primary components:
- EPDM Granules (Ethylene Propylene Diene Monomer): These are virgin, colored rubber particles known for their exceptional UV stability, vibrant color options, and resistance to extreme weather. They serve as the durable top “wear layer” of your surface.
- SBR Granules (Styrene-Butadiene Rubber): Typically sourced from recycled vehicle tires, these black granules are highly elastic and provide excellent impact absorption. They are often used to build a thick, cushiony sub-base layer.
When mixed with a specialized polyurethane binder, these granules form a porous, slip-resistant overlay. This makes it a stellar choice for wet areas like pool surrounds, where water drains straight through the surface instead of forming dangerous puddles.
But why choose a diy rubber surfacing denver installation over other options like pre-made rubber mats or traditional concrete? The secret lies in its seamless, custom nature. Rubber mats leave seams that can trip children or trap dirt, whereas poured-in-place rubber surfacing molds perfectly to any shape, curve, or step. Furthermore, why bonded rubber stone is the future of walkways comes down to its unique blend of comfort underfoot, noise reduction, and eco-friendly design.
From a structural standpoint, incorporating recycled rubber into construction is a highly respected practice. According to scientific research on recycled rubber concrete, adding rubber particles to aggregate mixtures provides excellent vibration damping, elasticity, and deformation control. By choosing rubber surfacing, you are bringing these same high-tech, sustainable engineering benefits straight to your backyard.
Planning Your DIY Rubber Surfacing Project in Denver
Before you open a single bag of rubber granules, a successful diy rubber surfacing denver project requires careful planning. You need to evaluate your local climate, check your target temperatures, and prepare your sub-surface.

First, let’s talk about the weather. Polyurethane binders are highly sensitive to temperature and moisture. To ensure the chemical reaction cures correctly, the temperature must be consistently between 10 and 28 degrees Celsius (50 to 82 degrees Fahrenheit) during the installation and for the next 24 hours. If you are installing this in the scorching summer heat of Tucson, Arizona, you will want to work early in the morning before the sun heats the sub-floor past the maximum threshold. Conversely, if you are in Indiana or Connecticut, wait for a dry spring or autumn window where nighttime temperatures won’t plunge below 10 degrees Celsius.
Next, you must evaluate the surface you are covering. Rubber surfacing can be applied over several sub-bases:
- Concrete: The most common base. It must be structurally sound, though surface cracks and minor pitting are perfectly fine to cover.
- Asphalt: An excellent candidate for resurfacing. If you have a tired, crumbling driveway, learning why a rubber stone driveway beats traditional asphalt will show you how easily you can skip the cost of a full excavation.
- Wood: Decks and steps can be covered, provided the wood is pressure-treated, securely fastened, and free of rot.
To prepare your sub-base, you must clean it thoroughly. Any dirt, oil, algae, or loose debris will prevent the polyurethane primer from bonding. We recommend using a high-pressure washer at least 24 hours before your project to blast away contaminants. If you have highly uneven concrete with sharp ridges, you can learn How to Use a Concrete Rubbing Stone to quickly smooth down high spots before applying your primer.
Step-by-Step Guide: How to Mix and Apply DIY Rubber Surfacing
Once your planning is complete and your sub-base is dry, it is time to mix and apply. Working with rubber surfacing is a physical process, but it is highly rewarding. To keep yourself organized, it helps to understand the exact specifications of the materials you are handling.
The standard mix ratio for a high-quality wear layer is 1 gallon of polyurethane binder per one 44.4-pound (20 kg) bag of EPDM granules. If you are building a thicker safety base layer underneath using recycled SBR granules, keep in mind that black SBR granules are typically sold in 44-pound (20 kg) bags, and one bag covers approximately 13 square feet at a 1-inch thickness.
Here is a quick reference table to help you compare the two layers if you are installing a dual-layer safety surface (common for backyard play areas in Raleigh or Nashville):
| Parameter | SBR Base Layer | EPDM Wear Course |
|---|---|---|
| Primary Material | Recycled tire buffings (black) | Virgin or recycled colored EPDM |
| Standard Bag Weight | 44 lbs (20 kg) | 44.4 lbs (20 kg) |
| Coverage per Bag | 13 sq. ft. (at 1″ thickness) | Approx. 16 sq. ft. (at 1/4″ thickness) |
| Binder Requirement | 1 gallon aromatic binder | 1 gallon aliphatic or aromatic binder |
| Primary Benefit | Maximum cushioning & fall protection | UV resistance, aesthetics, slip-resistance |
Once the binder is mixed with the rubber, the clock starts ticking. You have a working time of 30 to 40 minutes to spread, level, and trowel the mix before it begins to tack up and become unworkable.
Preparing the Base and Priming for Your DIY Rubber Surfacing
Before mixing your first batch, you need to set up your borders and apply your primer.
If your project area does not have a natural border (like a concrete curb or pool coping), you must install an edge. We recommend gluing down a 1/4-inch plastic or rubber edging strip around the perimeter using a heavy-duty construction adhesive like PL400. Do this 24 hours in advance so the border is completely secure.
When you are ready to lay the rubber, mix a small batch of pure polyurethane binder with a tiny bit of water or paint thinner to act as a primer. Roll this primer onto your sub-base using a paint roller.
Critical Tip: You must work in small sections. The “primer window” is very tight—you must spread your rubber surfacing mix over the primed area within 10 minutes of application. If the primer dries completely, it will lose its tackiness, and your rubber surfacing overlay will not adhere properly to the sub-floor. This is especially true on dry, porous concrete in places like Sanford, North Carolina, where the concrete can drink up the primer rapidly.
To dive deeper into the preparation phase, check out our comprehensive guide on diy pour in place rubber surfacing.
Mixing and Troweling Your DIY Rubber Surfacing
Now, let’s get mixing!
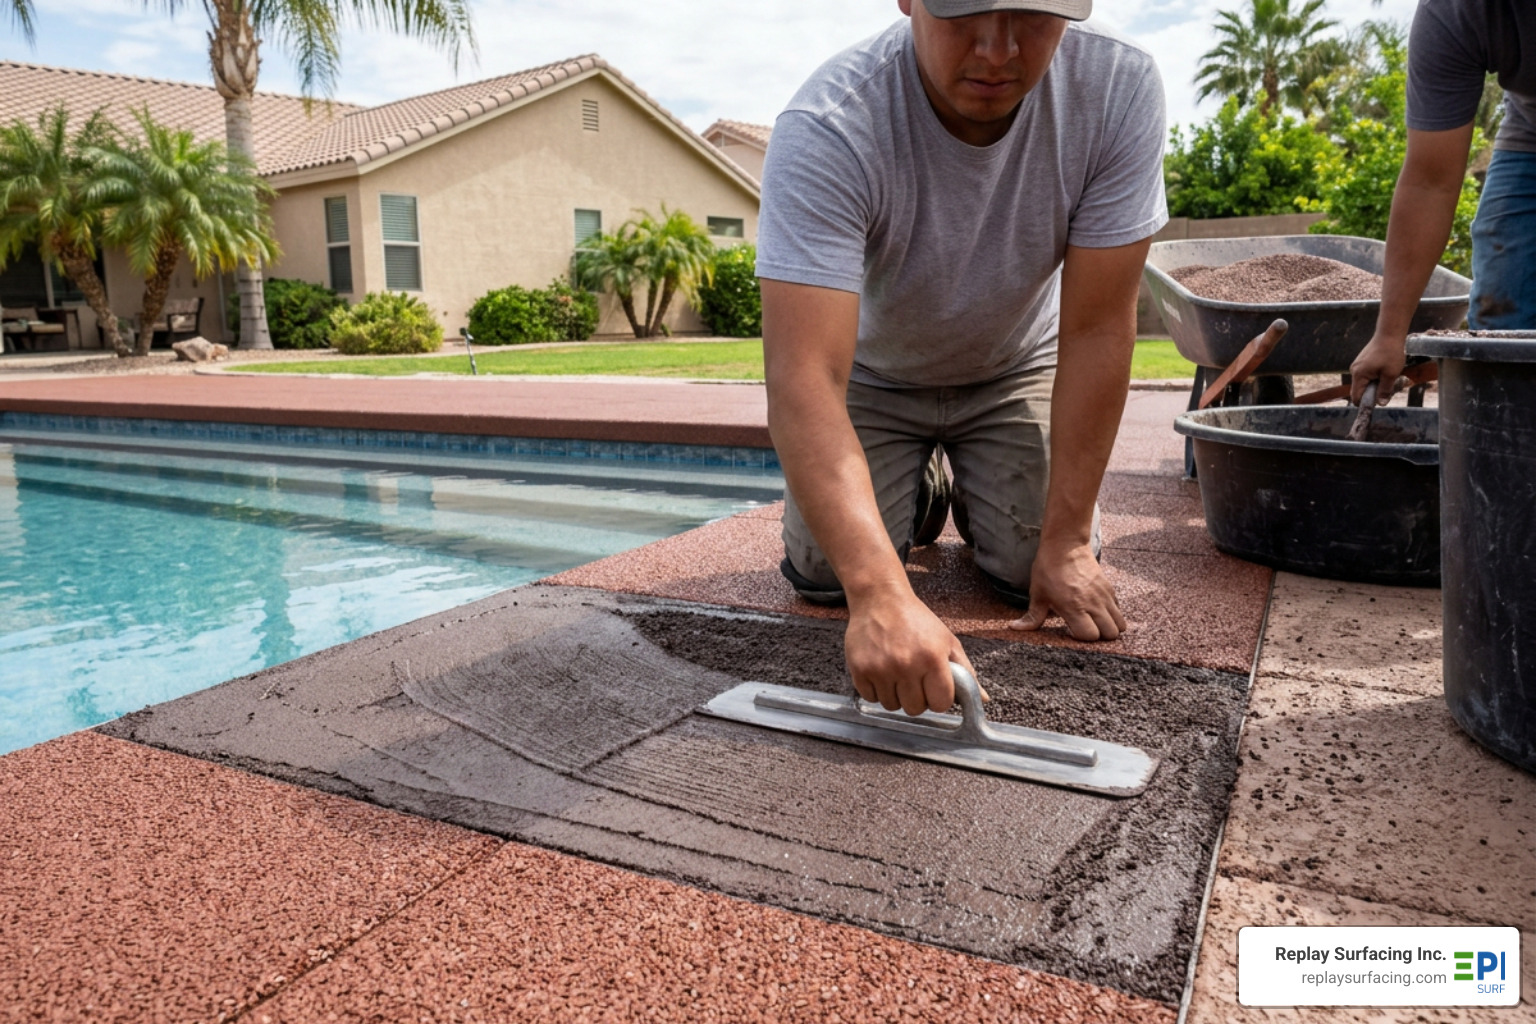
- The Mix: Dump one 44.4-pound bag of EPDM granules into a clean wheelbarrow or a portable mortar mixer. Slowly pour in 1 gallon of polyurethane binder. Mix thoroughly for 3 to 5 minutes using a drill with a mixing paddle or a clean shovel. Ensure every single granule is fully coated with the shiny binder.
- The Binder Choice: For sunny areas like pool decks in Columbia, South Carolina, or patios in Tucson, always use an aliphatic binder. Aliphatic binders are highly UV-stable and will not yellow or “amber” under the sun. Standard aromatic binders are cheaper and work beautifully for dark colors (like dark brown or black), but they will turn light greys, blues, and creams into a dull yellow over time.
- Spreading: Pour the wet mix onto your primed sub-base. Use a rake or a gauge rake to spread the mixture evenly to your desired thickness (usually 1/4 inch to 1/2 inch for walkways and pool surrounds).
- Troweling: This is where the magic happens. Using a 14-inch rounded-tip flexible steel trowel, begin smoothing the surface. To prevent the sticky binder from pulling the granules up, keep a bucket of soapy water (use a mild dish soap) and a brush nearby. Lightly damp your trowel with the soapy water frequently. Apply moderate, even downward pressure, keeping the leading edge of your trowel slightly angled upward so you glide over the rubber surfacing like a professional.
- Vertical Surfaces and Steps: Yes, you can apply rubber surfacing to vertical stair risers! To do this, mix a thickening agent called Cabosil powder (fumed silica) into your binder before mixing it with the rubber. This increases the viscosity, preventing the wet rubber surfacing from sagging down the vertical face while it cures.
For more detailed tips on transforming your backyard oasis, take a look at our guide on how to get your hands dirty the ultimate diy rubber pool deck makeover.
Maintenance, Longevity, and Cost of DIY Rubber Surfacing in Denver
Once your beautiful new rubber surfacing is laid, you will need to let it cure. We recommend a drying period of 48 to 72 hours before allowing heavy foot traffic or patio furniture on the surface.
One of the greatest benefits of rubber surfacing is how incredibly simple it is to maintain. Unlike concrete, which requires periodic crack-patching, or wood decks that need constant sanding and staining, rubber surfacing only requires basic care:
- Weekly Maintenance: Sweep or leaf-blow the surface to remove organic debris like leaves, dirt, or pine needles. This prevents organic stains from forming.
- Annual Cleaning: Pressure wash your rubber surfacing once or twice a year. Use a moderate pressure setting of 1,500 to 2,000 PSI and keep the wide-spray nozzle at least 12 inches away from the surface to avoid gouging.
- The Re-Roll: To keep your rubber surfacing looking brand new and structurally sound, all that is required is a quick top coat re-roll of polyurethane binder every 3 to 5 years. This replenishes the UV protection and locks any loose granules back into place.
With this minimal intervention, a well-maintained rubber surfacing can easily last 20 to 25 years. If neglected entirely, the surface may begin to shed granules and require major repairs or replacement in 10 to 15 years.
From a financial perspective, taking the DIY route is incredibly cost-effective. High-quality rubber surfacing materials typically sell for about $64 to cover approximately 1.5 square meters (around 16 square feet) at a 1/4-inch thickness. When you compare this to the thousands of dollars in labor fees charged by professional installers—or the massive cost of tearing out and repouring a concrete driveway—a DIY project offers massive savings. To see how these costs stack up against other safety surfaces, check out our bonded rubber mulch price guide.
Frequently Asked Questions about DIY Rubber Surfacing in Denver
To make sure your project goes off without a hitch, we have rounded up the most common questions DIYers ask during their installations.
Can rubber surfacing be applied over cracked concrete?
Absolutely! In fact, this is one of the primary reasons homeowners choose rubber surfacing. Traditional concrete and asphalt are rigid; when the ground shifts during seasonal temperature swings, they crack.
Because rubber surfacing is highly flexible, it acts as an elastomeric bridge over existing cracks. It expands and contracts naturally, hiding those ugly fissures while preventing new ones from reflecting through to the surface. To learn more about how rubber and cement aggregates interact, read our article on rubber concrete.
How do you choose the right color blend for your project?
Choosing your color is the fun part! Rubber surfacing is available in standard solid colors like grey, brown, beige, blue, and red, but the real beauty comes from creating two-color or three-color blends.
- Two-Color Blends: Mixing a base color (like light grey or cream) with a splash of black creates a high-contrast, modern granite look that hides dirt exceptionally well.
- Three-Color Blends: Combining earth tones like brown, beige, and cream offers a warm, natural stone aesthetic that blends beautifully with landscaping in Beaverton, Oregon, or Charlotte, North Carolina.
When choosing light colors (like cream, yellow, or light grey) for high-sun areas like Tucson or Raleigh, always remember to pair them with an aliphatic binder to ensure long-term UV stability and prevent yellowing.
What common mistakes should I avoid during installation?
To ensure a flawless finish, steer clear of these three common DIY pitfalls:
- Trapped Moisture: Never install rubber surfacing on a damp sub-base or when rain is forecast within 24 hours. Moisture will react prematurely with the polyurethane binder, causing foaming, bubbling, and a complete failure of the adhesive bond.
- Incorrect Binder Ratios: Do not try to stretch your binder further than recommended. Skimping on the polyurethane binder will result in a weak surface that sheds rubber granules within its first year. Stick to the golden rule of 1 gallon per 44.4-pound bag of EPDM.
- Ignoring Temperature Limits: Trying to install rubber surfacing when it is too cold (below 10°C) will stall the curing process, leaving your deck sticky for days. Installing when it is too hot (above 28°C) will make the binder cure too quickly, leaving you with unsightly trowel marks and seams.
Conclusion
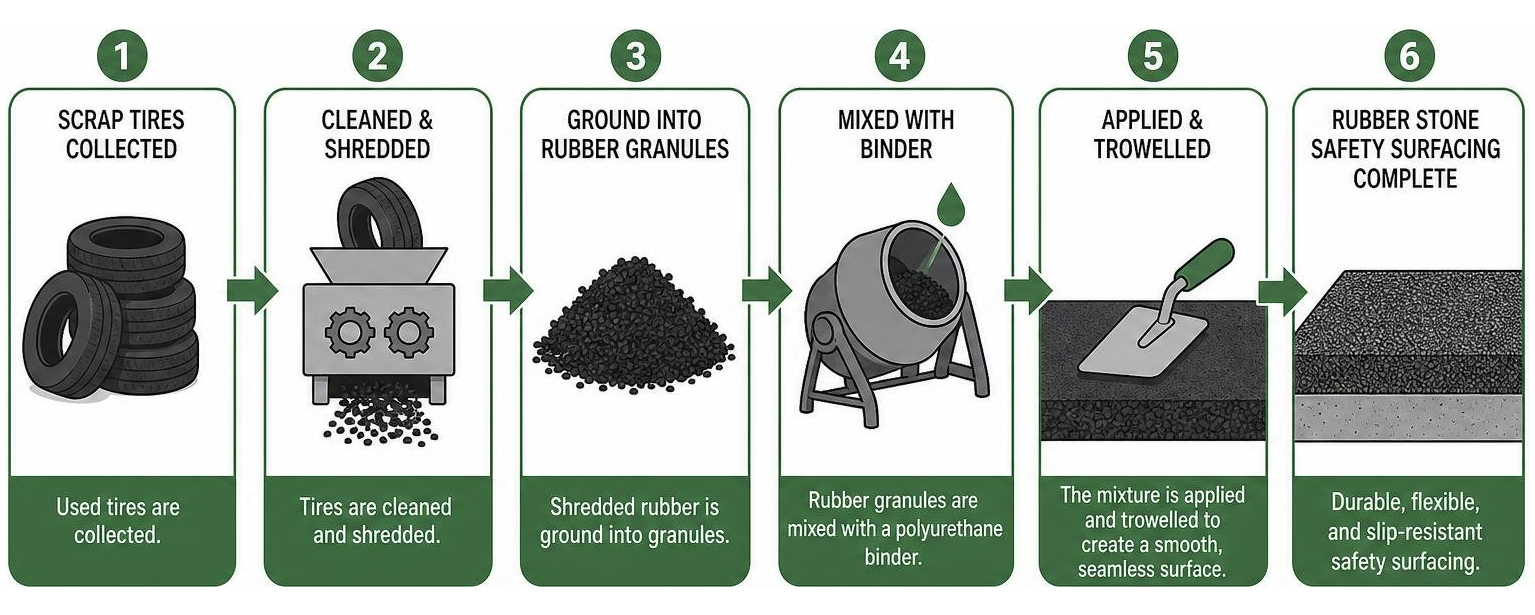
At Replay Surfacing Inc., our mission is to transform environmental challenges into beautiful, high-performance, and sustainable surfaces. By recycling scrap tires and combining them with premium EPDM granules, we help homeowners across our service areas—from the humid neighborhoods of Charlotte and Raleigh to the sunny pool decks of Tucson and the historic patios of Nashville—create outdoor spaces they can be proud of.
Taking on a diy rubber surfacing denver project is a fantastic weekend warrior task. A standard residential pool deck or patio takes approximately 5 hours to complete once the prep work is done. It is a highly satisfying project that rewards you with a soft, safe, and durable surface that will protect your family and beautify your home for decades to come.
If you decide that you would rather leave the troweling to the experts, or if your project area is larger than 20 square meters, we are always here to help. You can learn more about our professional installation options by visiting our page on professional rubber surfacing services in Denver.