
Why a DIY Rubber Surface for Playgrounds Is Worth Doing Right
A diy rubber surface for playgrounds is one of the smartest safety upgrades you can make for any play area — and it’s more achievable than most people think.
Here’s a quick answer if you’re short on time:
How to install a DIY rubber surface for a playground:
- Prepare and level the base (compacted gravel or concrete)
- Lay a geotextile weed membrane
- Mix SBR rubber granules with polyurethane binder (20% resin ratio)
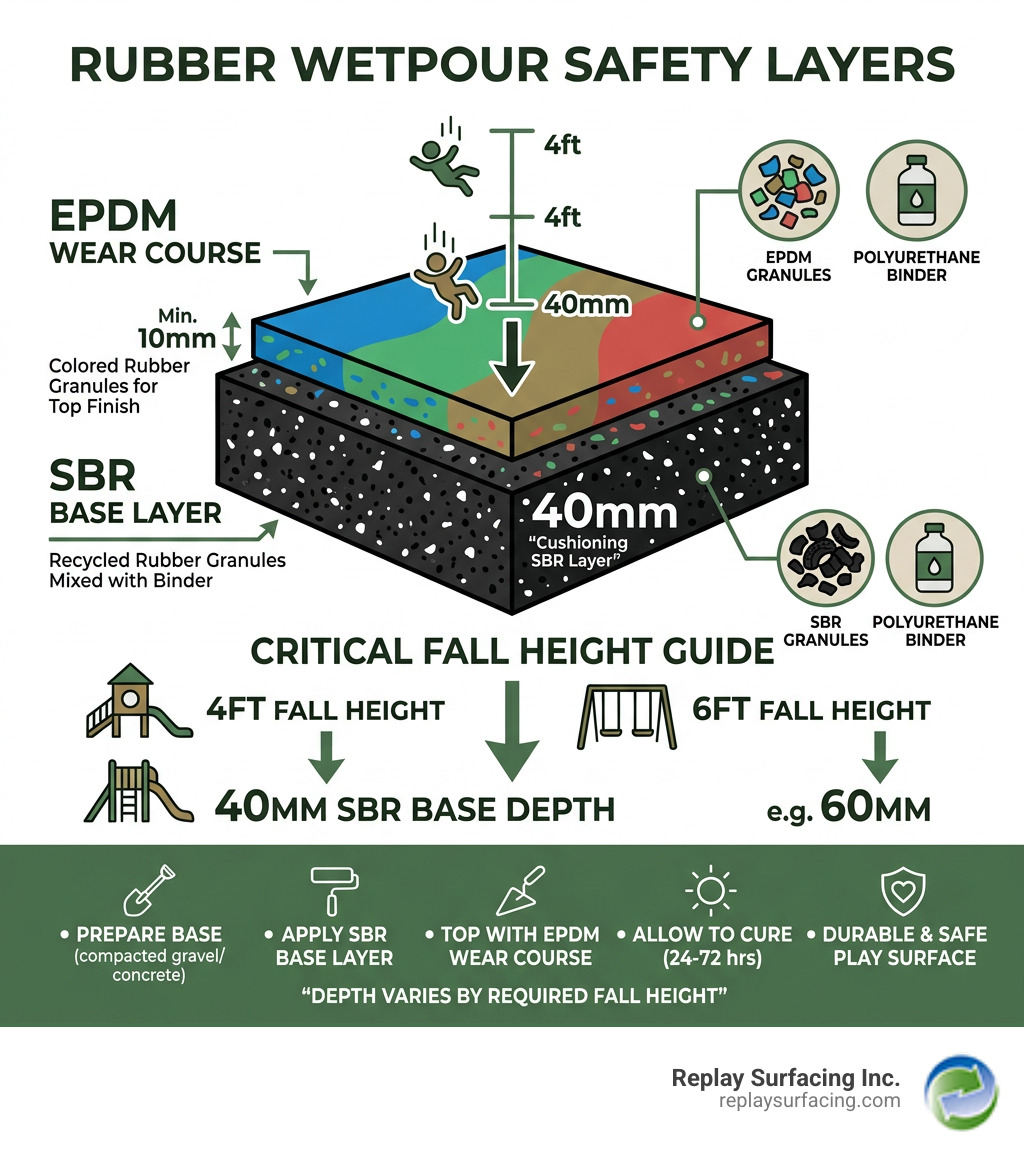
- Trowel the SBR base layer to the required depth (e.g., 40mm for a 4ft fall height)
- Apply the colored EPDM wear layer on top (minimum 10mm)
- Allow 24–72 hours to cure before use
Falls are the leading cause of playground injuries — accounting for 60% of all incidents, most of them head injuries. The surface beneath your equipment is the single biggest factor in whether a fall becomes a serious injury or a close call.
Traditional loose fills like sand or wood chips need to be at least 12 inches deep to cushion a fall adequately. Rubber surfacing — whether poured-in-place wetpour or interlocking tiles — delivers that protection at a fraction of the depth, with far less ongoing maintenance.
And the cost savings from doing it yourself are real. Labor alone makes up 50–60% of the total budget for a professionally installed wetpour surface. DIY puts that money back in your pocket.
I’m Landon Olson, operator of Replay Surfacing Inc. and a mechanical engineer with an MBA, and I’ve spent years working hands-on with diy rubber surface for playgrounds solutions — recycling millions of pounds of scrap tires into safe, durable surfacing. In this guide, I’ll walk you through everything you need to install a rubber playground surface that lasts.
Key terms for diy rubber surface for playgrounds:
Choosing the Right DIY Rubber Surface for Playgrounds
When you decide to tackle a diy rubber surface for playgrounds, the first step is choosing the system that fits your skill level and your playground’s needs. At Replay Surfacing, we specialize in transforming recycled tires into high-performance materials, but how you apply them matters.
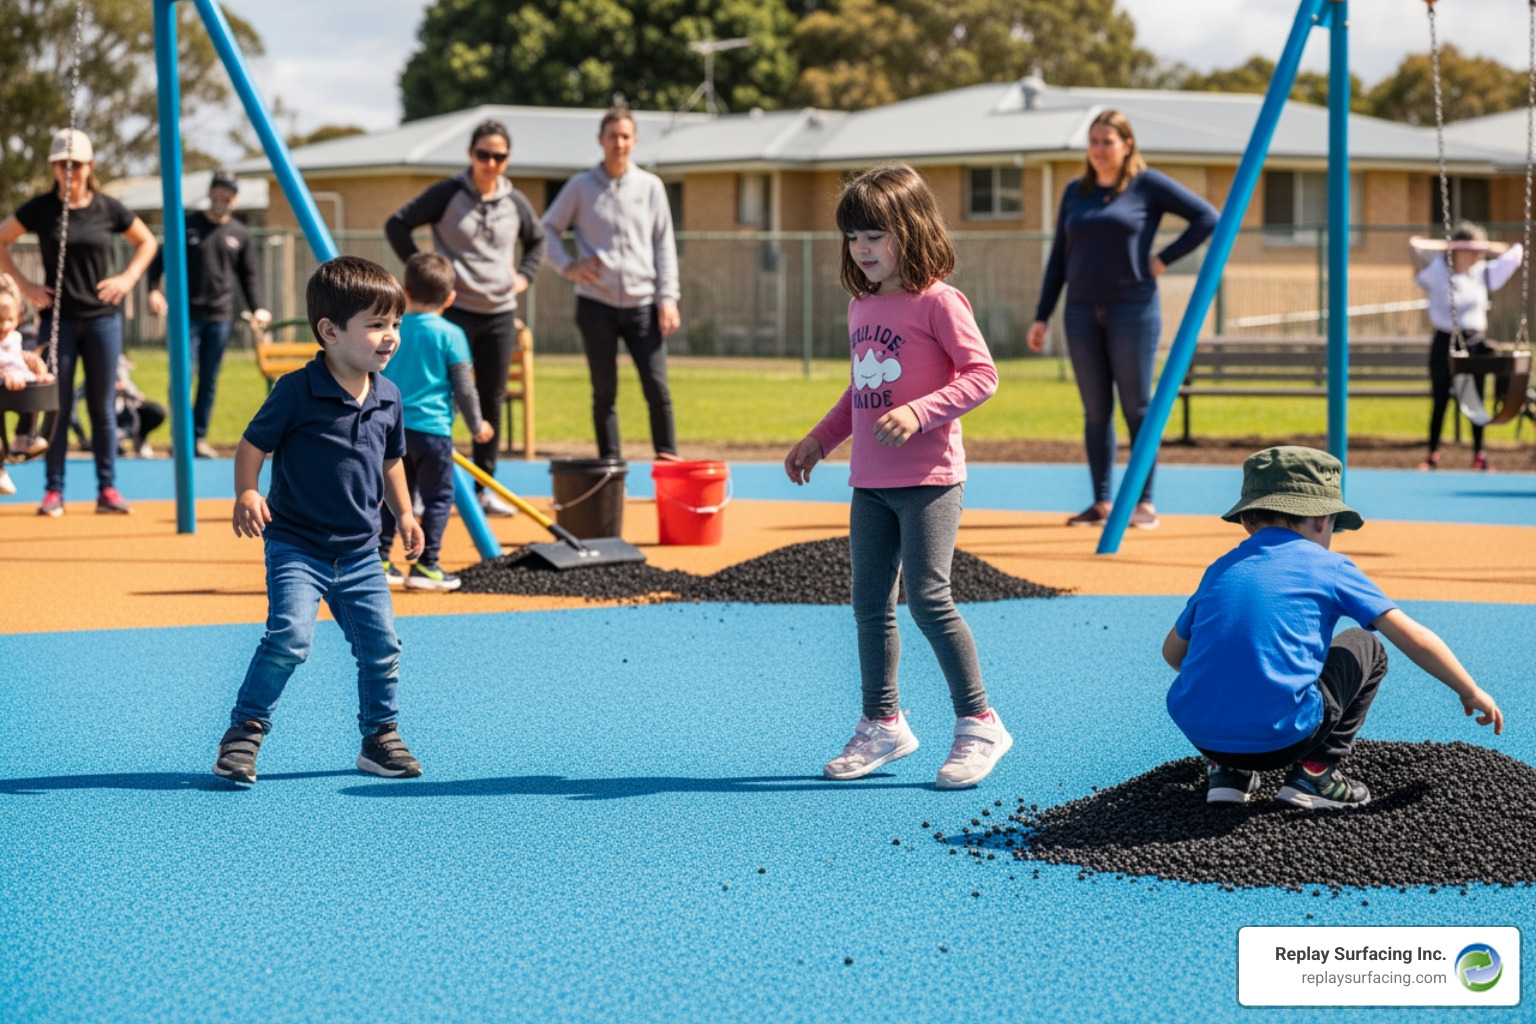
Poured-in-Place (PIP) / Wetpour
This is the “gold standard” of playground surfacing. It consists of a two-layer system: a base layer of SBR (Styrene Butadiene Rubber) granules for impact absorption and a top “wear layer” of EPDM (Ethylene Propylene Diene Monomer) granules for color and UV resistance.
- Pros: Seamless, highly customizable, and extremely durable.
- Cons: Requires more precision during the mixing and troweling phase.
- Best for: Large playgrounds, areas with complex shapes, or those wanting a professional “park” look. Check out our guide on DIY Playground Rubber Flooring for more details on this system.
Interlocking Tiles and Mats
If you want a faster setup, interlocking tiles are an excellent alternative. These are pre-manufactured squares (often 20×20 inches) that snap together using connector pins or adhesive.
- Pros: Very DIY-friendly, easy to replace individual tiles if damaged, and consistent thickness.
- Cons: Visible seams and less design flexibility than wetpour.
- Best for: Small backyard sets, rectangular areas, and quick weekend projects. Learn more about DIY Playground Flooring options here.
Rubber Mulch
For those on a budget or looking for a more “natural” aesthetic, rubber mulch offers superior cushioning compared to wood chips. It doesn’t decompose or attract pests, making it a “set it and forget it” loose-fill option.
Essential Materials and Tools for Installation
Preparation is the difference between a surface that lasts 15 years and one that cracks in six months. Whether you are in Tucson, AZ, or Raleigh, NC, the environmental conditions require the right chemical binders.
The Binder: Aromatic vs. Aliphatic
The “glue” that holds your rubber granules together is a polyurethane resin. You have two choices:
| Feature | Aromatic Binder | Aliphatic Binder |
|---|---|---|
| Cost | Budget-friendly | Premium (approx. 3x cost) |
| UV Resistance | Low (will yellow over time) | High (stays clear/stable) |
| Durability | Standard | Superior bond strength |
| Best Use | Dark colors (Black, Terra Cotta) | Bright colors (Blue, Yellow, Teal) |
Required Tools and Supplies
To achieve a professional finish, gather these essentials:
- Angle Mixer: Essential for ensuring every granule is evenly coated with resin.
- Primers: Used to help the rubber bond to concrete or asphalt edges.
- Steel Trowels: For smoothing the “wet” rubber into place.
- Soapy Water: Keep this in a spray bottle to lubricate your trowel; it prevents the rubber from sticking to your tools.
- Geotextile Membrane: Prevents weeds from growing through your surface while allowing water to drain.
- Safety Gear: Gloves, knee pads, and respiratory protection when handling binders.
Following Wet pour surfacing guidelines from RoSPA ensures that your installation meets high safety benchmarks. For a deep dive into material sourcing, view our page on DIY Pour In Place Rubber Surfacing.
Step-by-Step Guide to Installing a DIY Rubber Surface for Playgrounds
Ready to get your hands dirty? Installing a diy rubber surface for playgrounds is a labor of love that pays off in safety and aesthetics.
- Mixing: Use a ratio of roughly 20% resin to rubber. For a standard 25kg bag of rubber, you’ll typically use 5kg of binder. Mix until the granules are fully “wet” and glistening.
- Base Layer (SBR): Pour your mixed SBR granules. This layer provides the “bounce.” For a 1.5-meter (approx. 5ft) fall height, you’ll want about 40mm of SBR.
- Wear Layer (EPDM): Once the base is tacky, apply the colored EPDM layer (usually 10-15mm thick). This is where you can get creative with patterns!
- Curing: The surface needs a window of 24 to 72 hours to cure. Avoid installation if rain is in the forecast within 24 hours.
For a detailed walkthrough of the physical labor involved, read Get Down and DIY: Installing Your Playground Floor.
Preparing Your Site for a DIY Rubber Surface for Playgrounds
In locations like Raleigh or Nashville, proper drainage is vital. You don’t want your playground turning into a pond after a summer storm.
- Excavation: Dig out the area and ensure a 2% slope for water runoff.
- The Base: You can install over 4-6 inches of compacted crushed stone, or existing concrete/asphalt. If using concrete, it must be fully cured (at least 28 days old).
- Edge Priming: Apply primer to any hard borders (like wood or concrete) to ensure the rubber doesn’t pull away as it cures.
Local insights for Raleigh, North Carolina Playground Surfacing suggest that site leveling is the most skipped step — don’t make that mistake!
Mixing and Applying the Rubber Layers
The secret to a professional look is the trowel technique. Use long, sweeping motions and keep your trowel lubricated with soapy water. This prevents “clumping” and ensures a Rubber Wetpour DIY project looks like it was done by a pro.
Alternative DIY Options: Interlocking Tiles and Mats
If the idea of mixing chemicals and troweling large areas feels daunting, interlocking tiles are your best friend.
These systems use connector pins or specialized adhesives to lock together. They are particularly popular in Beaverton, OR, and Sanford, NC, for their speed of installation.
- Quick Setup: You can often install a small play area in just a few hours.
- Edge Ramps: Don’t forget to purchase border ramps to prevent tripping hazards.
- Guides: We have compiled an Interlocking Playground Mats Ultimate Guide and a guide on How to Install Rubber Pavers to help you choose the right thickness.
For more on tile-specific projects, see our Playsafe Interlocking Tiles Ultimate Guide or our instructions on Installing Playground Tiles.
Maintenance and Safety Standards for Your DIY Project
Building a diy rubber surface for playgrounds isn’t just about looks; it’s about meeting safety standards like ASTM F1292.
Ensuring Safety with a DIY Rubber Surface for Playgrounds
- The 6-Foot Rule: Your rubber surface should extend at least six feet in every direction from the edge of the equipment.
- Fall Heights: Ensure your rubber depth matches the “critical fall height” of your tallest piece of equipment. A 50mm depth typically protects up to a 1.5M fall.
- ADA Compliance: One of the best perks of rubber is that it is wheelchair accessible, unlike wood chips or sand.
Whether you’re looking at Safe Pour In Place Rubber Surfacing Across SC, NC & TN or a project in Nashville, Tennessee Playground Surfacing, safety is the priority. Our partners in Tucson, Arizona Playground Surfacing and Farmington, CT Rubber Playground Surfacing emphasize that shock pads are a must for high-climb equipment.
Long-Term Maintenance and Repairs
Rubber is low maintenance, but it isn’t “no maintenance.”
- Cleaning: Use a leaf blower for debris and a garden hose for dirt.
- Power Washing: A light power wash once a year keeps the pores open for drainage.
- Patching: If a small area cracks or is damaged, DIY patch kits are available to fill the gap seamlessly.
- Re-sealing: Every 2-3 years, applying a “roll coat” of binder can rejuvenate the surface and protect it from UV fading.
If you opted for mulch, you can find tips on Installing Rubber Mulch to keep it contained.
Frequently Asked Questions about DIY Rubber Flooring
Can I install rubber surfacing on a slope?
Yes! One of the unique benefits of wetpour is its ability to follow contours. We recommend a 2% slope for drainage, but it can be applied on hillsides up to 30 degrees. This is a great way to create “climbing mounds” or integrated slides in hilly backyards.
How much money does DIY installation save?
By tackling a diy rubber surface for playgrounds, you can save roughly 50-60% of the total project cost. Professional crews are expensive because of the specialized labor and travel. For a 500-square-foot area, this can mean keeping thousands of dollars in your pocket.
Is rubber surfacing suitable for basketball courts?
While rubber is great for playgrounds, it’s a bit “soft” for high-level basketball. The ball bounce won’t be as true as it is on concrete or specialized sport tiles. However, for a multi-use area where kids play both basketball and use a swing set, it’s a fair compromise for safety.
Conclusion
At Replay Surfacing Inc., we believe in turning environmental challenges into play-day solutions. By recycling tires into high-quality granules, we help you create a sustainable, safe, and beautiful space for your family. Whether you are in Charlotte, Tucson, or Indianapolis, a diy rubber surface for playgrounds is a project that provides peace of mind for years to come.
Ready to start your project? Explore Replay Surfacing Playground Solutions and let’s build something safe together!