
Why a DIY Rubber Playground Surface for Residential Yards in Charlotte, NC Is Worth Getting Right
If you’re planning a diy rubber playground surface residential charlotte nc project, here’s what you need to know upfront:
Quick-start overview:
- Choose your material — rubber mulch, poured-in-place, or interlocking rubber tiles
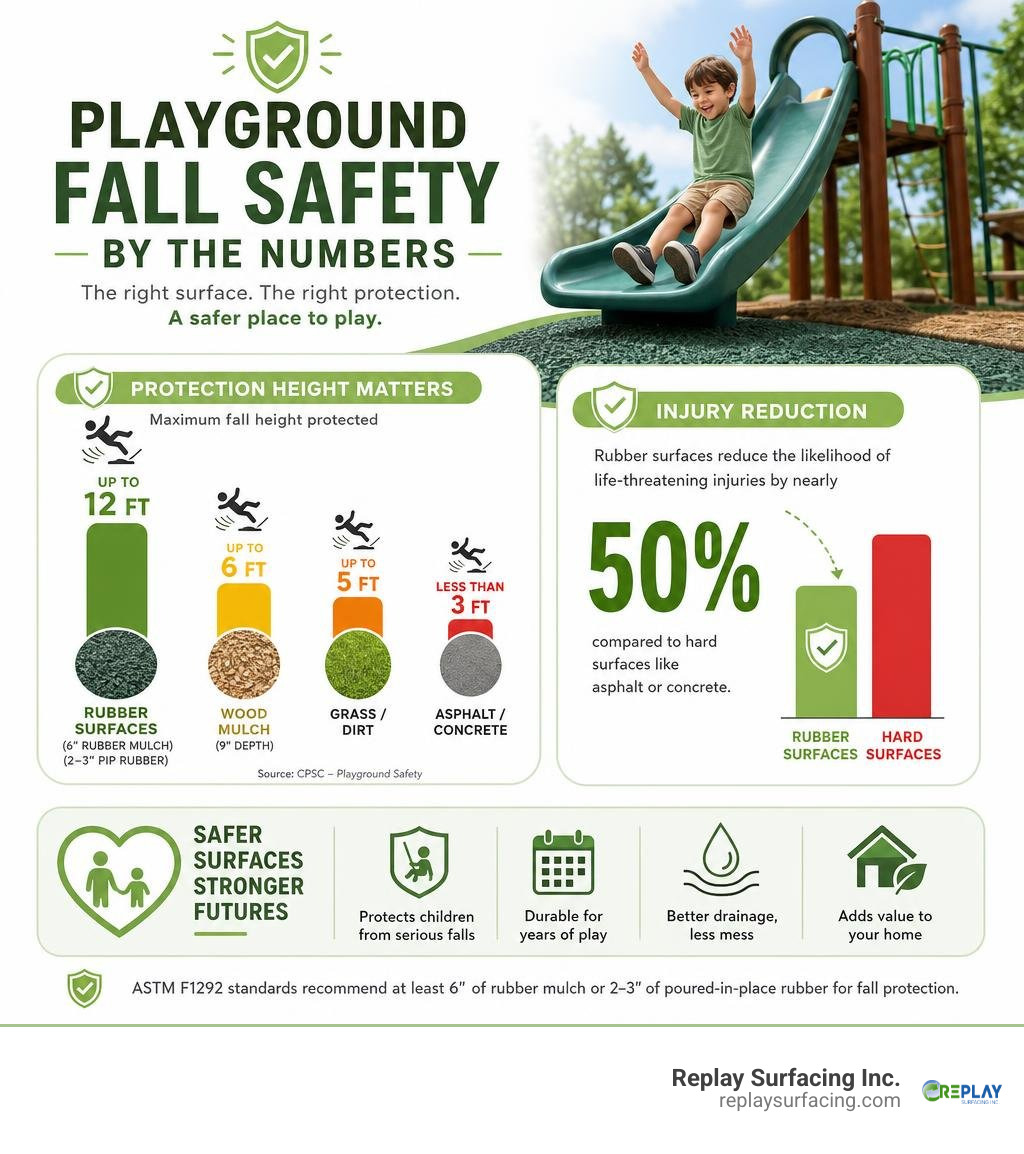
- Plan for fall height — you need at least 6 inches of rubber mulch or 2–3 inches of poured-in-place rubber to meet ASTM F1292 safety standards
- Prepare the ground — excavate, add a gravel sub-base, and lay geotextile fabric for drainage and weed control
- Install and finish — follow material-specific steps for spreading, mixing, or interlocking
- Maintain regularly — rake, clean, and inspect for wear to maximize a 10–15 year lifespan
- Save money — DIY installation typically costs 30–50% less than hiring a professional
Every year, over 200,000 children are treated in U.S. emergency rooms for playground injuries — and falls to the surface are the leading cause. That’s a sobering number, especially when the right surface can make a real difference. Rubber playground surfaces can protect children from falls up to 12 feet high, compared to grass or dirt which only offers protection under 5 feet. According to the CPSC, rubber surfaces reduce the likelihood of life-threatening injuries by nearly 50% compared to hard surfaces like asphalt or concrete.
The good news? You don’t need to hire a crew to get that level of protection in your own backyard. With the right materials, a solid plan, and a weekend or two, a residential rubber playground surface is well within reach for most homeowners.
This guide walks you through everything — from picking the right rubber material to installing, repairing, and maintaining your surface for years to come.
I’m Landon Olson, operator of Replay Surfacing Inc. and a mechanical engineer with an MBA, and I’ve spent years working across manufacturing, sustainability, and safety surfacing to help homeowners and facility managers find smarter, greener surfacing solutions — including diy rubber playground surface residential charlotte nc installs. Let’s get into the details so you can build something safe, durable, and built to last.
Easy diy rubber playground surface residential charlotte nc glossary:
Selecting and Planning Your DIY Rubber Playground Surface Residential Charlotte NC Project
Taking on a diy rubber playground surface residential charlotte nc project is one of the smartest upgrades you can make for your home. By rolling up your sleeves, you can save anywhere from 30% to 50% compared to professional installation costs. Whether you are building a new play zone in the humid summers of Charlotte, NC, or setting up a safe space under the intense sun of Tucson, AZ, rubber surfacing provides a resilient, weather-resistant barrier that outperforms traditional grass or wood mulch.
In wet climates like Beaverton, OR, or Lake Charles, LA, wood mulch quickly turns to soggy mush and harbors mold, while grass wears down to slick mud. Rubber surfaces, on the other hand, provide excellent drainage and stay slip-resistant. Over its 10-to-15-year lifespan, this durable material saves you time on endless weeding and top-offs. If you want to explore how these systems fit into your budget, check out our guide on Safe and Sound Backyard Play Area Flooring Options for Every Budget and learn why parents choose Durable Backyard Rubber Flooring That Kids and Parents Love.
Selecting the Right Rubber Materials for Your Backyard
When selecting your materials, you have three primary options for your backyard. Each has unique advantages depending on your budget, DIY experience, and aesthetic preferences. If you’re looking for a quick breakdown, explore the Top Rated Backyard Playground Flooring Options You Can Buy Today.
- Rubber Mulch: This loose-fill option mimics the look of natural wood mulch but doesn’t rot, attract pests, or splinter. It offers exceptional shock absorption at a highly affordable price point. It’s incredibly easy to install—just dump and rake.
- Poured-in-Place (PIP) Rubber: This seamless, two-layer system consists of a base layer of clean tire buffings and a top wear layer of colored rubber granules mixed with a polyurethane binder. It is highly customizable, wheelchair-friendly, and stays exactly where you put it.
- Rubber Tiles: These interlocking tiles offer a clean, modular look. They are simple to install over concrete, asphalt, or compacted gravel, making them ideal for flat, defined play areas.
| Material Type | DIY Difficulty | Relative Cost | Lifespan | Best Suited For |
|---|---|---|---|---|
| Rubber Mulch | Very Easy | Low | 10+ Years | Large areas, budget-conscious projects, natural look |
| Poured-in-Place | Moderate to High | Medium-High | 10–15 Years | Custom shapes, seamless surfaces, maximum accessibility |
| Rubber Tiles | Easy | Medium | 10+ Years | Flat square/rectangular zones, patios, hard sub-bases |
Planning Your DIY Rubber Playground Surface Residential Charlotte NC Layout
Before ordering materials, you must plan your layout with safety standards in mind. The critical fall height of your play equipment determines how thick your safety surfacing must be. Under ASTM F1292 standards, the surfacing must be capable of absorbing the impact of a fall from the highest designated play surface of your play structure.
For example, if your swing set deck is 6 feet high, your rubber surface must be rated to protect against a 6-foot fall. To achieve this, you will need a minimum of 6 inches of loose-fill rubber mulch or a specific thickness (typically 2 to 3 inches) of poured-in-place rubber.
Additionally, you must establish a “use zone” or safety buffer. This buffer should extend at least 6 feet in all directions from the edge of the play equipment. For swings, the safety zone should extend twice the height of the pivoting bar both in front and behind the swings. Be sure to check your local municipal building codes in your area—whether you are in Raleigh, NC, Columbia, SC, or Hartford, Connecticut—to ensure compliance with residential setback rules. To help pick the right setup, read our guide on How to Choose the Perfect Playground Safety Mat and dive into The Ultimate DIY Guide to Rubber Playground Flooring.
Calculating Materials for a DIY Rubber Playground Surface Residential Charlotte NC Area
Calculating your material needs accurately prevents costly project delays and saves you from paying extra shipping fees to get a second delivery out to your home in Indiana, Nashville, TN, or Sanford, NC.
To calculate the volume of material needed:
- Measure the Area: Break your playground footprint down into simple geometric shapes (rectangles, circles, triangles) to calculate the total square footage.
- Determine Thickness: Select your thickness based on your fall height requirements (e.g., 6 inches for rubber mulch, 2 inches for PIP).
- Use the Formula:
- For Poured-in-Place and Mulch: Multiply your total square footage by your desired thickness in inches, then divide by 12 to get the cubic feet required.
- Formula:
(Square Footage × Thickness in Inches) ÷ 12 = Cubic Feet - For Rubber Mulch: Divide your cubic feet by 27 to convert the volume into cubic yards, as loose-fill is often sold by the yard or ton.
- For Rubber Tiles: Simply divide your total square footage by the square footage of a single tile (usually 4 sq. ft. for a standard 2’x2′ tile) and add a 5% to 10% overage buffer for cuts and waste.
For a deeper dive into pricing and material budgeting, check out How Much Does Playground Flooring Cost Your Guide to Economical Options.
Step-by-Step Installation and Ground Preparation Guide
A successful diy rubber playground surface residential charlotte nc installation is only as good as the ground beneath it. Skipping proper prep work will lead to uneven surfaces, poor drainage, and premature wear.
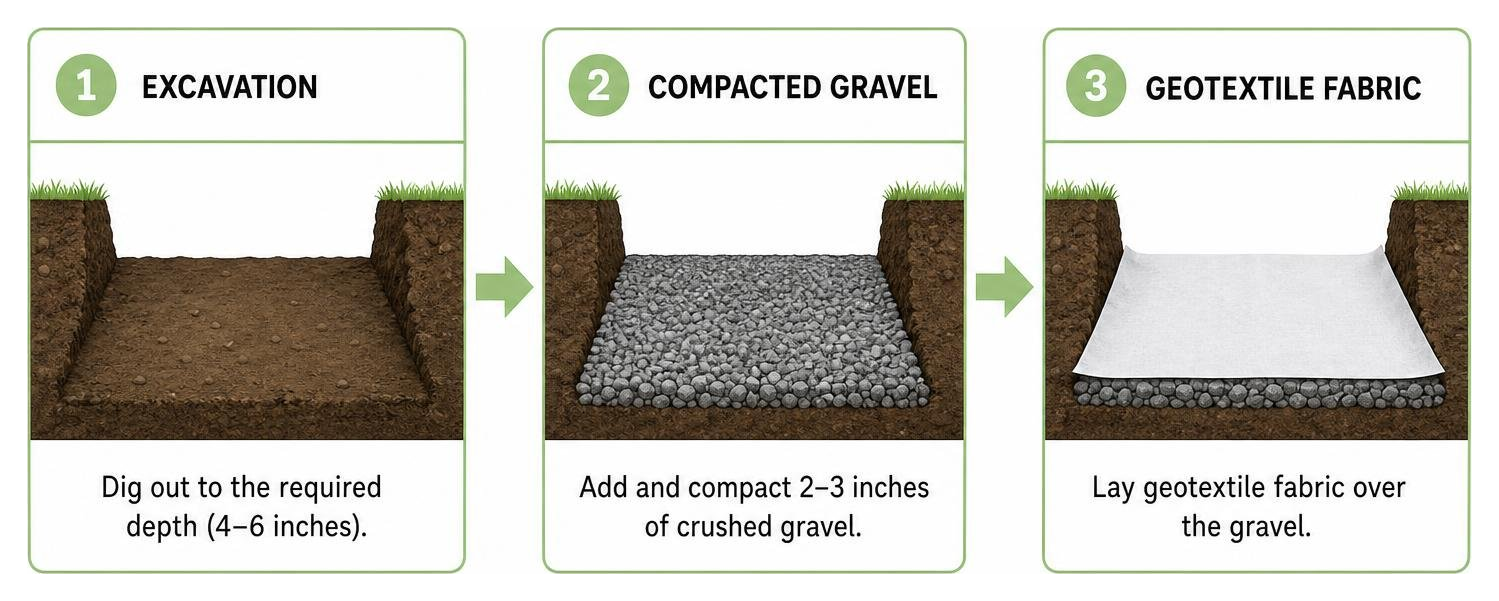
Here is how to prep your site like a pro:
- Excavation: Dig out the designated playground area. For rubber mulch, excavate to a depth of 4 to 6 inches. For poured-in-place or tiles over a gravel base, excavate 3 to 4 inches to accommodate both the sub-base and the safety surfacing.
- Clear Debris: Remove all rocks, roots, grass, and debris. Treat the soil with a pet-safe weed killer if you are dealing with aggressive local weeds.
- Establish Drainage and Slope: Grade the excavated area slightly (about a 1% to 2% slope away from residential structures) to ensure water runs off and doesn’t pool under your playground.
- Lay Geotextile Fabric: Cover the entire excavated area with a high-quality, commercial-grade geotextile fabric. Overlap the seams by at least 12 inches and secure them with landscape staples. This fabric is crucial: it prevents dirt from mixing with your clean rubber, blocks persistent weeds, and allows rainwater to drain freely.
- Add the Sub-base: For poured-in-place rubber or tiles, spread 2 to 3 inches of crushed stone or gravel (such as aggregate base). Compact it thoroughly using a mechanical plate compactor until it forms a rock-hard, level surface.
For complete ground prep instructions, check out our guides on DIY Playground Flooring and DIY Playground Rubber Flooring.
Installing Poured-in-Place Rubber Surfacing
If you have chosen a seamless look, installing a poured-in-place surface requires careful attention to detail and a bit of elbow grease. Learn the ropes with our guides on DIY Pour in Place Rubber Surfacing, Rubber Wetpour DIY, and How to Install Your Own Poured in Place Rubber Surface.
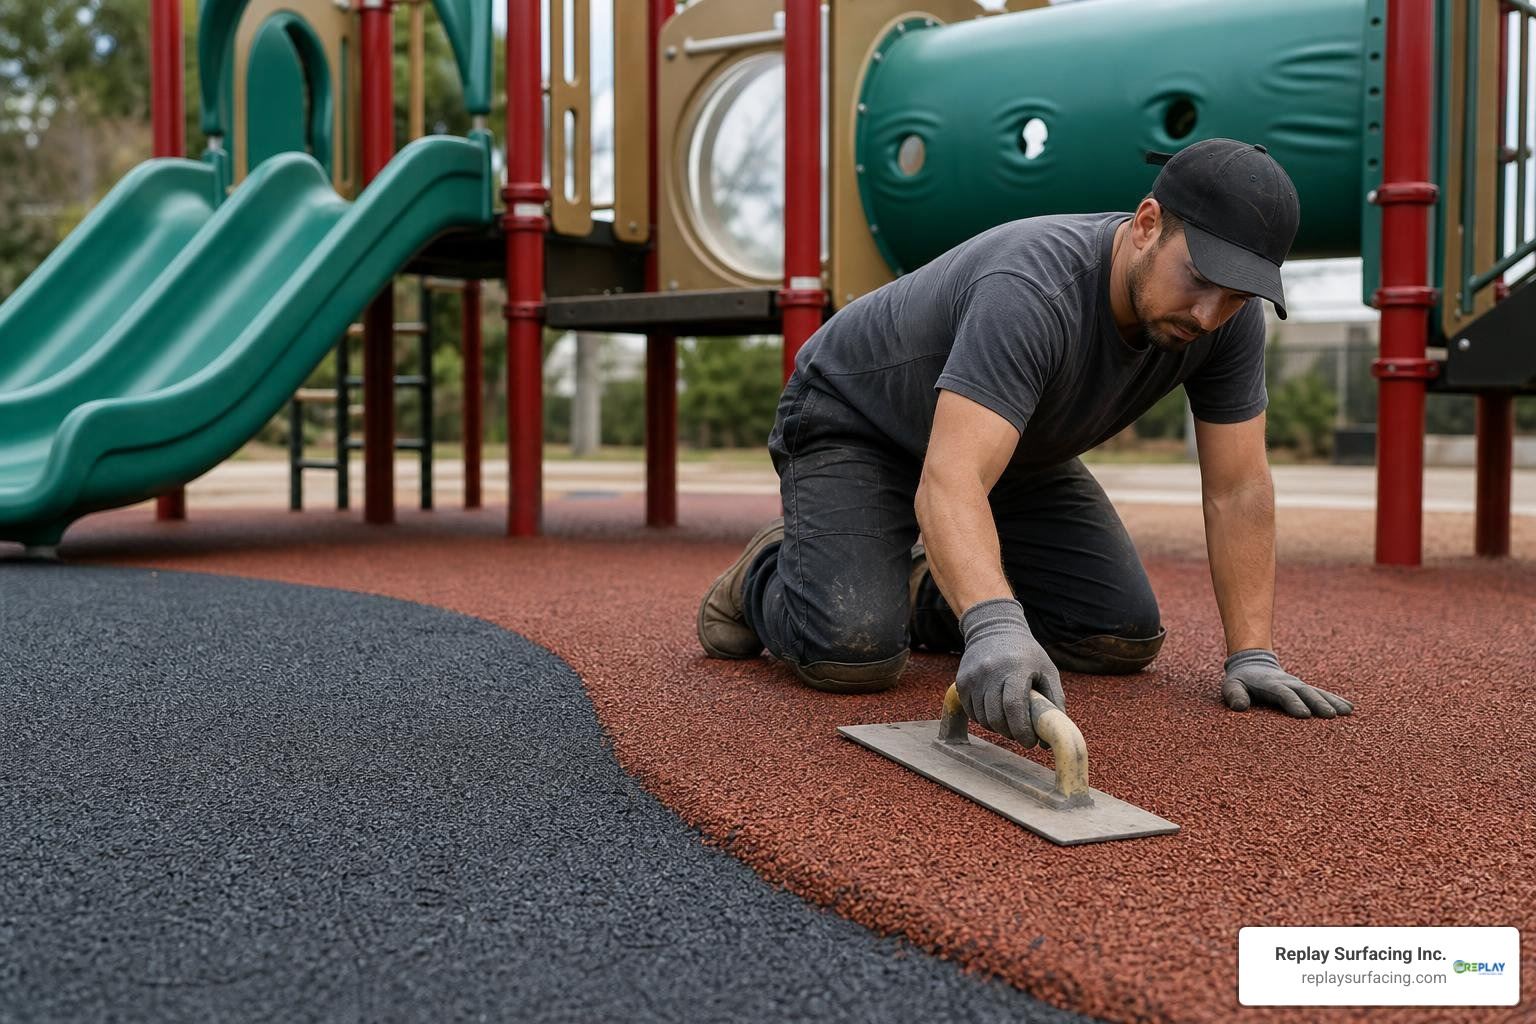
- Step 1: Prep the Binder and Rubber: Poured-in-place rubber is installed in two steps—a base cushion layer and a top wear layer. Mix your rubber granules with the high-quality polyurethane binder in a large mortar mixer or a heavy-duty bucket using a drill mixer. Follow the manufacturer’s exact mixing ratios.
- Step 2: Spread and Level: Pour the mixed rubber onto your prepared sub-base. Use a screed board or a clean rake to distribute the mixture evenly to your target thickness.
- Step 3: Trowel the Surface: Hand-trowel the mixture using a pool trowel. Wipe your trowel regularly with a release agent (like soapy water or diesel fuel) to keep the rubber from sticking to your tool. Apply consistent downward pressure to compact the granules together.
- Step 4: Allow to Cure: Let the base layer cure completely (usually 12 to 24 hours depending on local humidity in places like Lake Charles, LA, or Sanford, NC). Once dry, repeat the mixing, spreading, and troweling process for your colored top wear layer. Keep foot traffic off the surface for a full 48 hours to allow it to cure completely.
Installing Rubber Mulch and Tiles
If you prefer a simpler installation process, rubber mulch or interlocking tiles are excellent alternatives. Learn more about these methods in our guide: Get Down and DIY Installing Your Playground Floor.
- Installing Rubber Mulch:
- Install a sturdy timber, composite, or rubber border around your excavated and fabric-lined playground perimeter.
- Dump the rubber mulch directly into the play area.
- Use a hard garden rake to spread the mulch evenly to a depth of at least 6 inches. Loose-fill materials compact slightly over time, so adding an extra inch is a smart safety buffer.
- Installing Rubber Tiles:
- Start in one corner of your prepared, compacted gravel or concrete sub-base.
- Lay the first tile down, ensuring it is square with your border.
- Connect the adjacent tiles using the manufacturer’s interlocking plastic pins or built-in interlocking edges. Apply a thin bead of polyurethane adhesive to the seams if you want a permanent, seamless fit.
- Cut edge tiles to fit using a sharp utility knife and a straight edge.
How to Repair and Maintain Your Residential Rubber Surface
While rubber surfaces are incredibly durable, regular maintenance is the key to maximizing their 10-to-15-year lifespan.
- Routine Cleaning: Sweep or leaf-blow your surface regularly to remove leaves, twigs, and dirt. For a deeper clean, wash the surface down with a garden hose. If you spot stubborn stains, use a mild, eco-friendly dish soap, a soft-bristle scrub brush, and warm water. Avoid harsh petroleum-based cleaners, which can break down the rubber binder.
- Weed Control: While geotextile fabric prevents most weeds, airborne seeds can occasionally sprout in the dust that accumulates on top of the rubber. Pull these out by hand as soon as you see them.
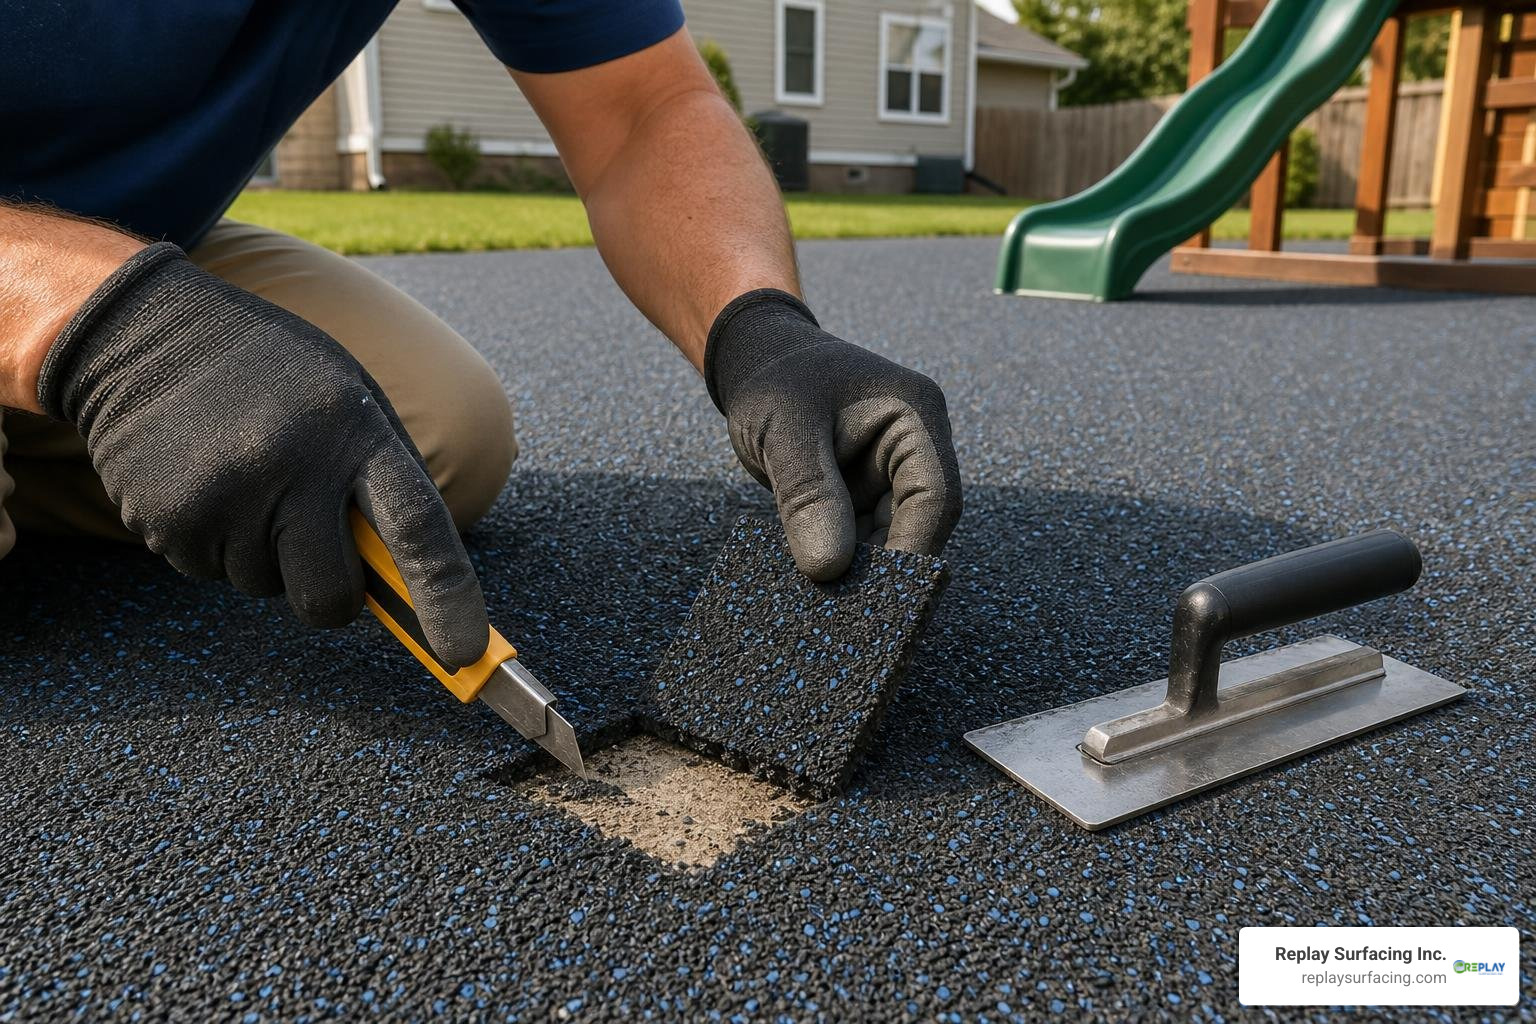
- How to Patch Damaged Areas: Over time, high-traffic areas—like the zones directly under swings or at the bottom of slides—can experience localized wear.
- Cut out the damaged or loose rubber using a utility knife, creating clean, vertical edges.
- Vacuum out any loose debris and dirt from the hole.
- Purchase a DIY rubber patch kit. Mix the rubber granules and binder in a bucket.
- Prime the edges of the cut-out area with a thin coat of pure polyurethane binder.
- Pack the new rubber mixture into the hole, troweling it flat so it sits flush with the surrounding surface. Let it cure for 24 to 48 hours.
Read more about keeping your yard in peak condition with The Complete Guide to Residential Rubber Surfacing and discover why Poured Rubber Residential Installation Is the Upgrade Your Yard Deserves.
Frequently Asked Questions About Residential Rubber Surfacing
How much does a DIY rubber playground surface cost compared to professional installation?
Taking on a diy rubber playground surface residential charlotte nc project saves you a significant amount of money. On average, homeowners save between 30% and 50% by choosing to install the surface themselves. Professional installation costs typically range from $12 to $25+ per square foot, depending on your location, site prep needs, and material choices. By purchasing your materials directly and handling the labor yourself, you can bring your costs down to $4 to $10 per square foot for rubber mulch or DIY poured-in-place kits. For a comprehensive cost breakdown, check out Understanding Rubber Playground Surfacing Costs and The Ultimate Guide to Professional Rubber Playground Installation.
What is the critical fall height rating for residential rubber surfaces?
The critical fall height rating represents the maximum fall height from which a surface can prevent a life-threatening head injury. To meet ASTM F1292 safety standards:
- Rubber Mulch: A depth of 6 inches provides protection for fall heights up to 10 feet or more.
- Poured-in-Place Rubber: A 2-inch thickness generally protects against falls up to 4 to 5 feet, while a 3-inch thickness is rated for falls up to 7 to 8 feet.
- Rubber Tiles: Ratings vary by manufacturer, but a standard 2-inch thick tile typically protects against falls up to 6 feet.
Always match your surface thickness to the highest platform on your play equipment. For official guidelines, you can consult the CPSC Playground Safety Guidelines.
How do you ensure proper drainage under a rubber playground surface?
Proper drainage prevents standing water and protects your sub-base from eroding. To keep your play area dry:
- Ensure your sub-grade soil is sloped (1% to 2% grade) away from your home.
- Use a highly permeable crushed stone or gravel sub-base (such as 3 to 4 inches of compacted aggregate) rather than laying rubber directly over heavy clay soil.
- Always install a high-quality geotextile fabric. This allows water to pass straight through into the soil while keeping dirt from clogging your drainage system. Learn more about system drainage on our Playground Surfacing page.
Conclusion
Creating a safe, beautiful play area for your children doesn’t have to be an overwhelming or incredibly expensive project. By choosing a diy rubber playground surface residential charlotte nc installation, you can build a highly durable, impact-absorbing play zone that protects your family while saving you thousands in professional labor fees.
At Replay Surfacing Inc., we are proud to operate in the recycling and construction industry. Our mission is to transform environmental hazards—like scrap tires—into sustainable, highly customizable, and exceptionally durable surfacing products. By using our recycled rubber solutions, you are not only protecting your kids; you are also making an eco-friendly choice that keeps waste out of landfills.
Whether you are located near our hubs in Charlotte, NC, Raleigh, NC, Sanford, NC, Columbia, SC, Tucson, AZ, Connecticut, Indiana, Nashville, TN, Beaverton, OR, or Lake Charles, LA, we are here to support your DIY journey. If you decide you’d like a helping hand with your project, our network of experienced Playground Safety Surfacing Installers is always ready to step in.
Ready to get started? Explore our Residential surfacing options today, and let’s build a safer, greener backyard together!