Transform Your Space with Rubber Wetpour DIY
Rubber wetpour diy is a practical and eco-friendly way to create durable, safe, and attractive surfaces for playgrounds, sports areas, and more.
For a quick answer to your DIY installation needs, here’s what you need to know:
- Preparation: Clear and level your surface, ensuring good drainage.
- Materials: EPDM rubber granules, polyurethane binder, primer, and basic mixing tools.
- Installation: Mix the granules and binder, trowel evenly onto the surface, and smooth carefully.
- Curing: Allow at least 24 hours to cure properly before use.
I’m Landon Olson, operator of Replay Surfacing. With a mechanical engineering background focused on sustainable solutions, I’ve specialized in creating innovative surfacing methods including rubber wetpour diy, helping facilities achieve safe and eco-conscious playgrounds and sport areas.

Quick rubber wetpour diy definitions:
– diy playground rubber flooring
– wetpour rubber surfacing
– installing playground tiles
What is Wetpour Rubber Surfacing and Why Choose DIY?
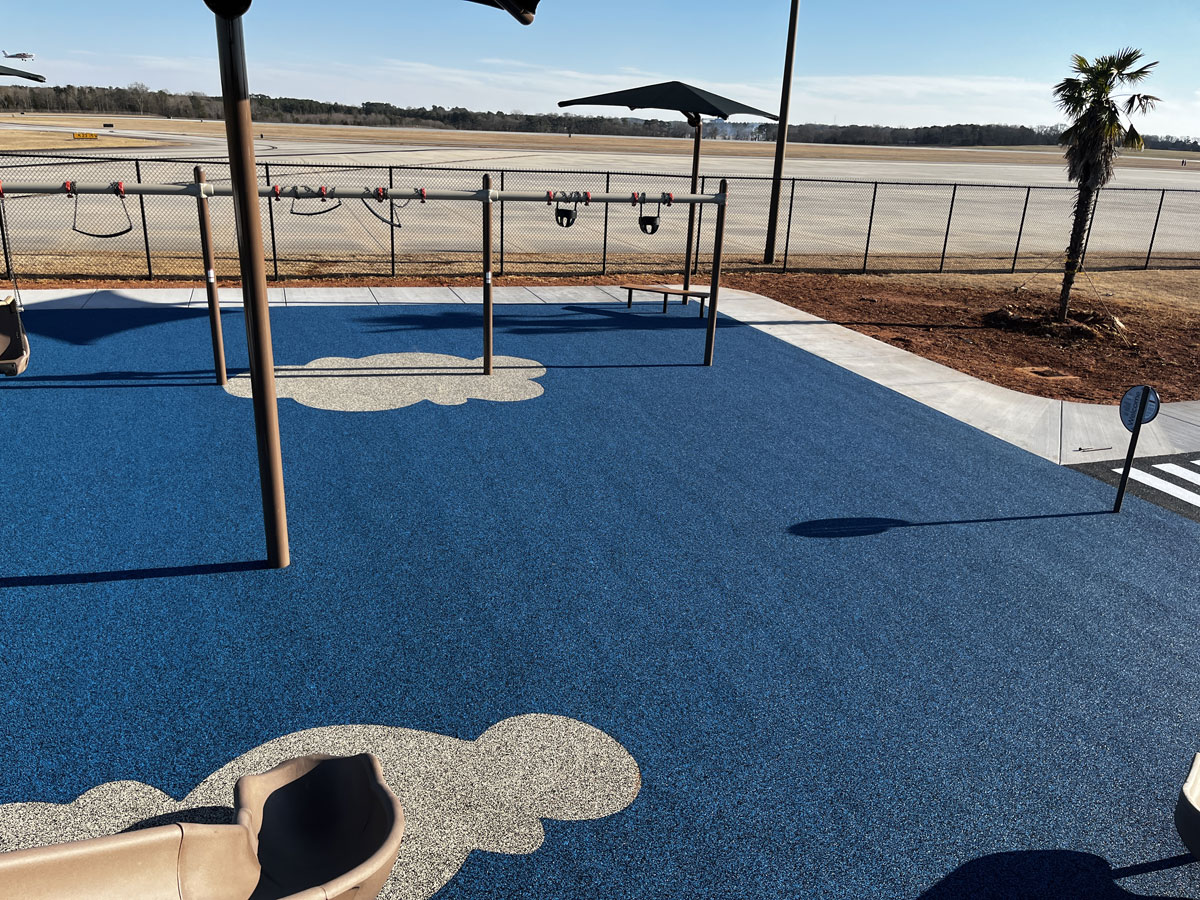
Wetpour rubber surfacing is a seamless, impact-absorbing surface designed primarily for playgrounds, sports courts, and recreational areas. It’s created by carefully mixing rubber granules with a polyurethane binder, resulting in a safe, soft surface that significantly lowers the risk of injury from falls.
Typically, you’ll find wetpour surfaces made up of two distinct layers. The base layer is crafted from SBR (Styrene Butadiene Rubber). That’s just a fancy way of saying recycled rubber tires! This layer provides the critical cushioning and shock absorption your kids (and their elbows and knees!) will thank you for. The top layer is formulated with EPDM rubber granules, a durable and UV-stable material available in many vibrant colors. So, not only does your surface perform well—it also looks fantastic.
One major consideration: professional wetpour rubber installations can be quite pricey. Often, labor alone makes up about 50-60% of the total budget. That’s exactly why many people choose the rubber wetpour diy route. By installing it yourself, you cut out those hefty labor costs and enjoy substantial savings.
Just ask one of our customers, who said, “I was ready to replace my entire rubber surface until I finded DIY options. Learning how to repair and install it myself saved me thousands of dollars!” Plus, doing the installation yourself means you control every detail—from design choices to timing. No more waiting around for contractors; instead, you set your own schedule and pace.
Curious to learn more about poured-in-place rubber surfacing? Our detailed guide on poured in place rubber as the ultimate playground safety surface has everything you need to know.
Benefits of DIY Rubber Wetpour Installation
Choosing rubber wetpour diy isn’t just about saving money—though that’s a pretty huge bonus. It’s also a fantastic eco-friendly choice. Did you know each square foot of wetpour surfacing can use around one to two pounds of recycled rubber? That’s old tires staying out of landfills and getting a fresh lease on life.
But the perks don’t stop there. Wetpour surfaces offer outstanding durability and weather resistance. Expect your DIY rubber wetpour surface to last anywhere between 10 to 15 years with basic maintenance. It’s tough enough to handle freezing winters, scorching summers, and everything in between—without cracking, chipping, or falling apart.
Safety is another strong suit. Your DIY installation can easily comply with important safety standards like BS EN 1177, which covers impact absorption and critical fall heights. Wetpour surfaces also provide essential slip resistance—even when wet—making playground slips and tumbles less likely.
Practically speaking, wetpour surfaces are incredibly user-friendly. Their porous structure drains water quickly, meaning no annoying puddles after rain. Plus, weeds can’t grow through the seamless rubber, so say goodbye to hours spent pulling pesky weeds from your play area or pathway.
Barry Baker, preparing information for RoSPA (the Royal Society for the Prevention of Accidents), sums it up nicely: “A wet pour surface offers a seamless, continuous play area surfacing created onsite through a specific blend of rubber granules and binder, ensuring a safe environment for children.” If you’d like more information on safety standards and best practices, check out the Wet pour surfacing guidelines from RoSPA.
Applications for Wetpour Rubber Surfaces
One of the best things about rubber wetpour diy is how versatile it is. You can install it practically anywhere you need a durable, safe, and attractive surface.
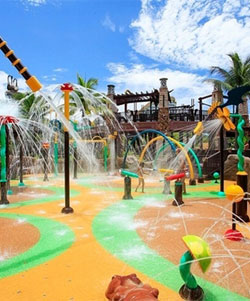
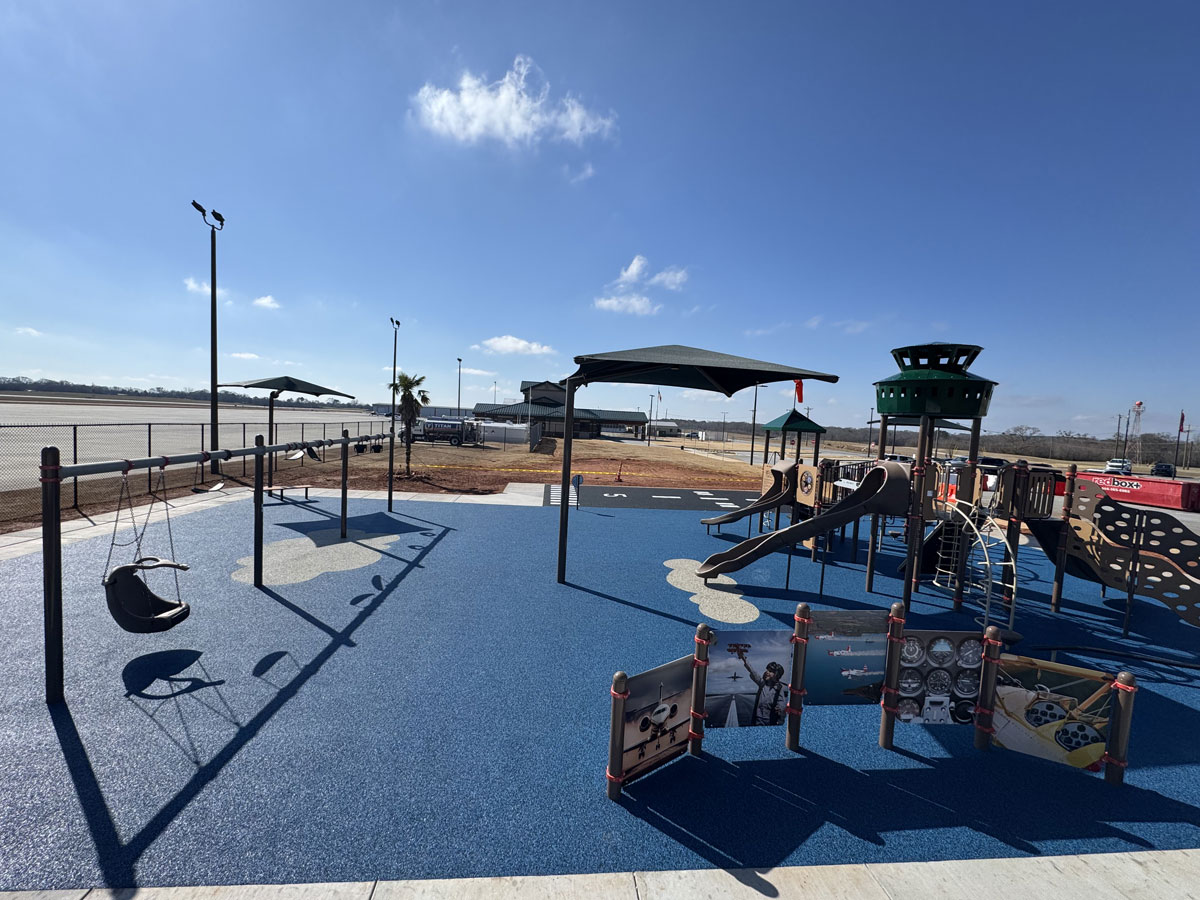
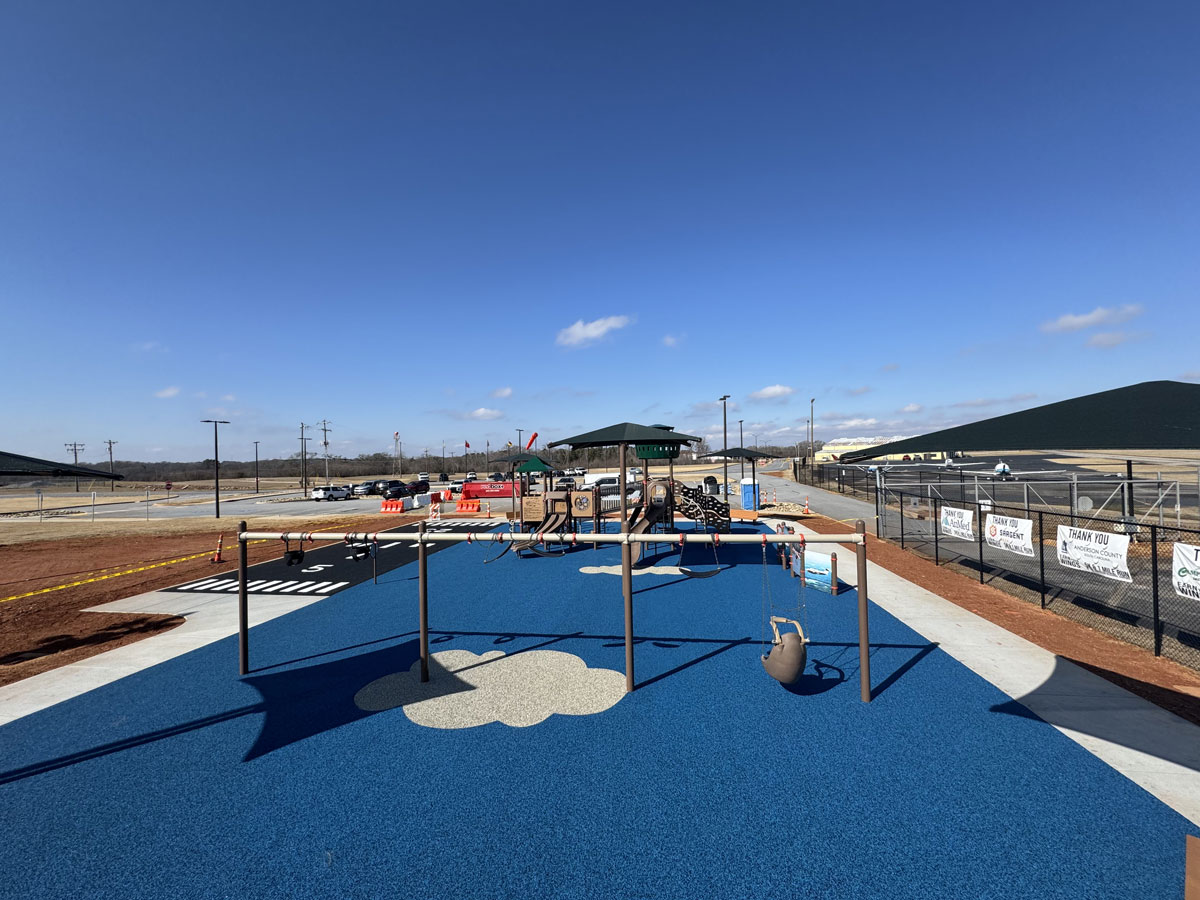
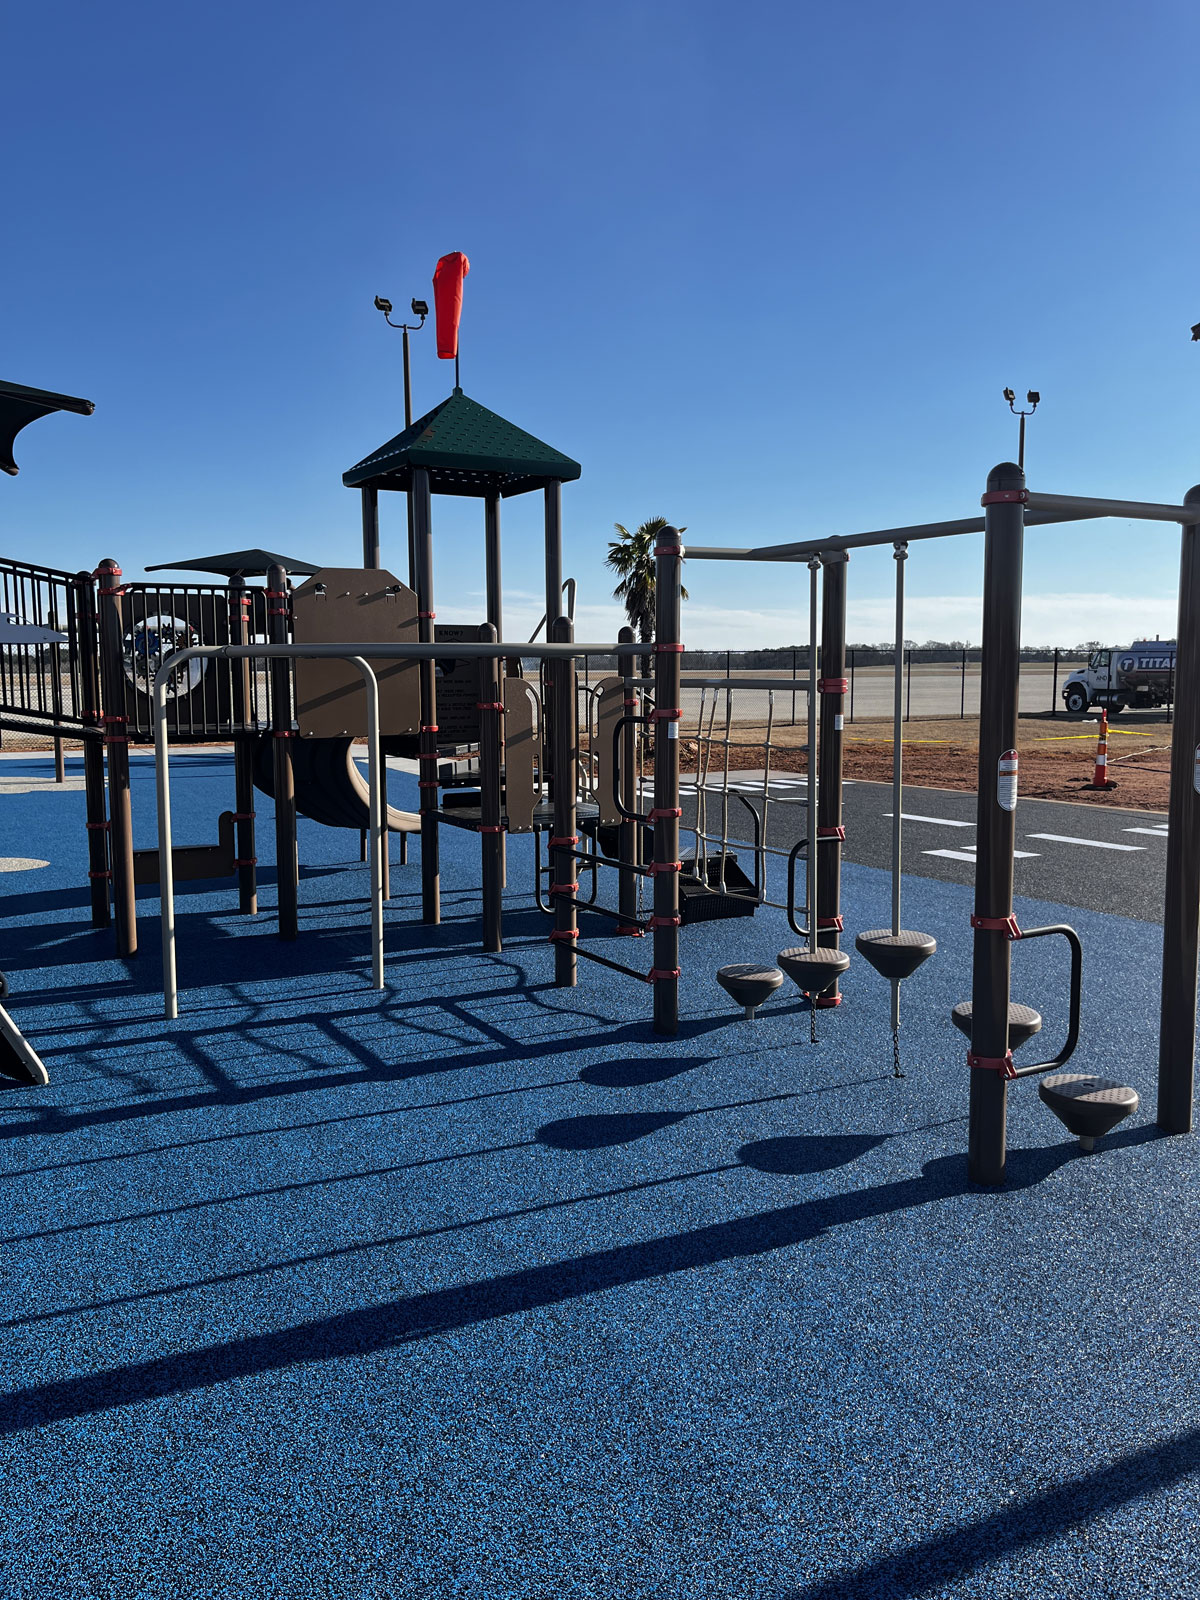
Playgrounds are the most common use, naturally. Bright colors, games, and educational elements can be built right into the surface, making it both fun and functional. Around pools, wetpour surfaces offer comfort, exceptional drainage, and slip-resistance, keeping everyone safe and happy.
At home, rubber wetpour diy works beautifully for garden pathways, patios, and even under swing sets and trampolines—creating a soft, weed-free surface that’s stroller- and wheelchair-friendly. For sports courts, wetpour provides the perfect balance of shock absorption and traction, ideal for basketball, tennis, or outdoor gyms.
Commercially, wetpour rubber surfacing is a popular choice in daycare centers, schools, public parks, and residential care homes. Even equestrian facilities enjoy the comfort and durability of rubber wetpour flooring.
One family in Charlotte, NC, recently shared their story with us: “We transformed our backyard into a safe play zone for our kids using the rubber wetpour diy approach. The surface looks professional, and we saved at least 40% compared to hiring contractors.”
Essential Materials and Tools for DIY Rubber Wetpour
Before diving into your rubber wetpour diy project, have everything you need close at hand. Gathering your materials and tools beforehand will save you from frustrating mid-project trips to the store (we’ve all been there!) and ensure you achieve professional-quality results.
Understanding Rubber Wetpour Components
The first step is getting familiar with the essential materials for your project. The top layer of your wetpour surface is made up of EPDM rubber granules. These granules, typically sized between 1-4mm, come in a range of vibrant colors to let your creativity run wild. EPDM is UV-stable, meaning your bright, eye-catching design won’t fade under the sun’s rays.
Beneath this colorful top layer lies the SBR base layer, made from recycled tires. Usually black and slightly larger (granules from 2-8mm), this eco-friendly layer provides the crucial shock-absorption that makes rubber wetpour a favorite for playgrounds and sports courts.
Holding everything together is the polyurethane binder, a strong, moisture-curing adhesive. Mixing ratios are key here—generally around 18% binder for your top EPDM layer and 10-12% for the SBR base layer. Getting these ratios right ensures a durable, long-lasting surface.
Before you start laying down your rubber mixture, you’ll prep your base surface with a primer. Think of primer as a friendly handshake—it helps your wetpour stick tightly and bond securely to concrete, asphalt, or other prepared sub-bases, extending the lifespan of your installation.

It’s tempting to cut corners, but trust us—using quality materials makes all the difference. Virgin EPDM granules, for instance, outperform recycled alternatives by resisting brittleness and providing superior durability. For more detailed guidance on materials, you can check out our handy guide on DIY Playground Rubber Flooring.
Required Tools and Safety Equipment
Equipped with the right materials, you’ll now want reliable tools for a smooth installation. A proper mixer is a lifesaver—consider a forced-action mixer like the Crete Angle mixer for larger projects, or a simple mixing tub and paddle drill attachment if you’re working on a smaller scale.
To spread your wetpour evenly, a sturdy steel trowel (ideally with a pointed tip) is your best friend. A tamping tool or hand float helps you compact the granules neatly, while a roller makes applying the primer quick and easy. Keep a straight edge or screed bar handy for leveling your surface, ensuring it stays flat and even. Don’t forget a good old-fashioned Stanley knife for precision cuts and neatly finished edges.
Accurate measurements are crucial—grab your tape measure, a trusty spirit level, and some chalk or string lines to keep everything in check. Edge formers—whether timber battens, metal edging, plastic formwork, or pre-cast concrete—will help define the edges neatly and maintain your wetpour’s shape as it cures.
Of course, safety comes first in any DIY project! Protect yourself with heavy-duty chemical-resistant gloves, safety goggles, a respirator mask or dust mask, and steel-toed boots. Wearing knee pads, long sleeves, and pants will keep your skin safe from potential irritation. Plus, let’s be honest—looking like a DIY superhero is a bonus!
At Replay Surfacing, we believe the right tools and materials are just half the battle. Knowing how to use them confidently makes all the difference. That’s why we proudly offer comprehensive online training. As one of our industry experts likes to remind us, “Did you know that we can train your park and school personnel on Poured in Place installs, maintenance and repairs via Zoom Classes?” With the right preparation, you’ll be laying down your rubber wetpour diy surface like a seasoned pro in no time.
Step-by-Step DIY Rubber Wetpour Installation Guide
Now that you’ve thoroughly prepared yourself with the right materials, tools, and knowledge, it’s time to bring your rubber wetpour diy project to life! By carefully following this step-by-step guide, you’ll create a stunning, seamless surface that looks professionally installed—without the hefty price tag.
Let’s dive right in!
Preparing the Surface for Rubber Wetpour DIY
Proper surface preparation is the foundation of every successful rubber wetpour diy project. Spending extra time here will significantly increase the lifespan and durability of your playground or sports area surface.
Begin by carefully measuring and marking out your installation area. Plan for effective drainage by creating a gentle slope—just a 1-2% gradient is enough—to prevent water pooling later.
Next, start excavating your area. Remove existing grass, soil, or old surfacing to a depth of around 6-10 inches. This depth leaves ample space for a 4-6 inch crushed stone sub-base along with your rubber layers (usually an additional 1.5-4 inches, depending on your chosen thickness and fall height requirements).
Once excavated, lay down a geotextile membrane. This simple barrier prevents weeds and vegetation from popping up through your new rubber surface. After laying the membrane, spread your sub-base material—typically MOT Type 1 crushed stone—at least 6 inches thick. Compact this layer firmly using a plate compactor or roller, ensuring it’s as level and even as possible.
Now it’s time to set up your edge formwork. You can use timber, metal, plastic formwork, or concrete edging—choose what suits your budget and design goals best. Ensure your edging is securely fixed, level, and matches your desired final surface height.
If you’re laying your wetpour onto an existing concrete surface, preparation is slightly different. Ensure your concrete is clean, dry, and free of cracks or loose materials. You can cut a keying channel (about 5mm deep) around the edges to help lock the rubber in place. If you’re using freshly poured concrete, allow it at least seven days to cure before installing your rubber.
Finally, apply your primer evenly across the prepared base using a roller. This step is essential, as the primer helps bond your rubber layers securely to the base. Allow the primer to become slightly tacky—typically taking about 1-2 hours depending on temperature. Only prime the areas you can cover in rubber within the same day to ensure optimal adhesion.

One of our customers in Raleigh shared, “I spent almost two full days on just preparing my base, but it was worth every minute. Even after three years, my rubber wetpour diy surface looks great—no cracks, no lifting edges!”
For more detailed tips and advice, check out our comprehensive guide on wetpour rubber surfacing.
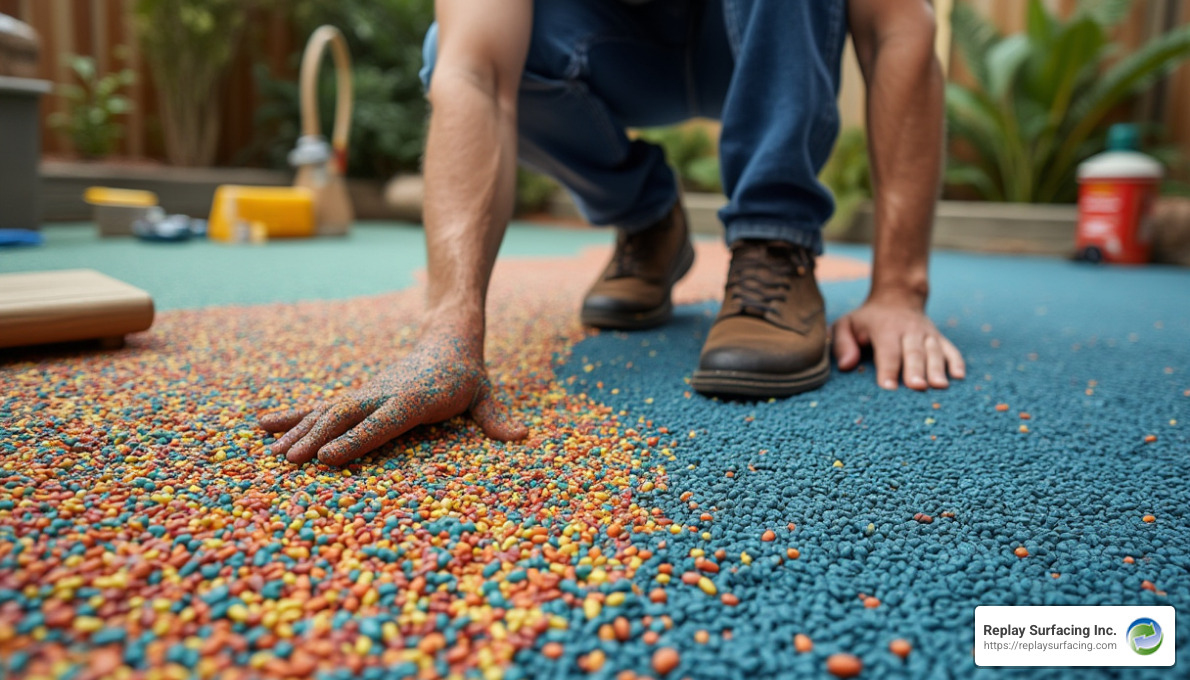
Mixing and Applying Your DIY Rubber Wetpour
With your surface now perfectly prepared, you’re ready for the exciting part—mixing and applying your rubber wetpour mixture!
First, let’s quickly recap the materials required per layer:
- Base Layer (SBR): You’ll use about 8-9 kg of rubber granules per square meter for every 10mm thickness, mixed with a polyurethane binder at around 10-12%.
- Top Layer (EPDM): This colorful top layer typically needs about 10-12 kg per square meter per 10mm thickness, with a higher binder percentage of around 18-20%.
Always mix your base layer (SBR granules) thoroughly first. Place the measured rubber granules into your mixer, then accurately measure and add your polyurethane binder (10-12% of granule weight). Mix thoroughly for a few minutes until all granules are evenly coated and look consistent.
Once mixed, move swiftly to apply the rubber mixture to your primed surface. Spread it out evenly using a rake or straight edge, ensuring consistent depth throughout. Gently tamp it down with a hand float or tamping tool. Work in sections, always carefully joining each new area to the previous one to create a seamless connection.
Next up, it’s the vibrant EPDM top layer. Ensure your mixer is cleaned thoroughly before switching to the colorful granules. Mix the EPDM granules with a slightly higher ratio of polyurethane binder (18-20%), aiming for a slightly wetter texture than your base layer. Apply this layer directly on top of the base layer while it’s still slightly tacky—ideally within 24 hours—to create a strong, lasting bond.
Using a clean steel trowel that’s lightly lubricated with release agent, carefully smooth and compact the top layer to a thickness of about 15-20mm. Use gentle pressure and circular motions to achieve a professional-quality finish.
An experienced installer we work closely with shared his best advice: “The real secret to a perfect surface is all in the trowel technique. Keep your trowel clean, slightly wet, and use smooth, gentle motions. Take your time—it’s worth the extra care!”
Here’s a quick reference table summarizing the key mixing ratios and thicknesses:
| Layer Type | Rubber Amount | Binder Percentage | Typical Thickness |
|---|---|---|---|
| SBR Base Layer | 8-9kg/m² per 10mm | 10-12% | 20-80mm (depending on fall height) |
| EPDM Top Layer | 10-12kg/m² per 10mm | 18-20% | 15-20mm |
Finishing Touches and Curing Your Wetpour Surface
You’re almost there! With your rubber layers expertly applied, let’s focus on those all-important finishing touches.
First, carefully inspect and finish off your edges. For areas meeting soft ground, create a smooth, gentle slope at the edges to prevent trip hazards. Where rubber meets hard surfaces like concrete or brick, ensure the edges are flush for a seamless look. Trim any excess material carefully with a Stanley knife while the surface is still semi-cured.
After letting the initial surface firm up (usually about 30-60 minutes), make one last pass with your clean, lubricated trowel. Gently smoothing away any trowel marks or imperfections ensures a beautifully finished surface.
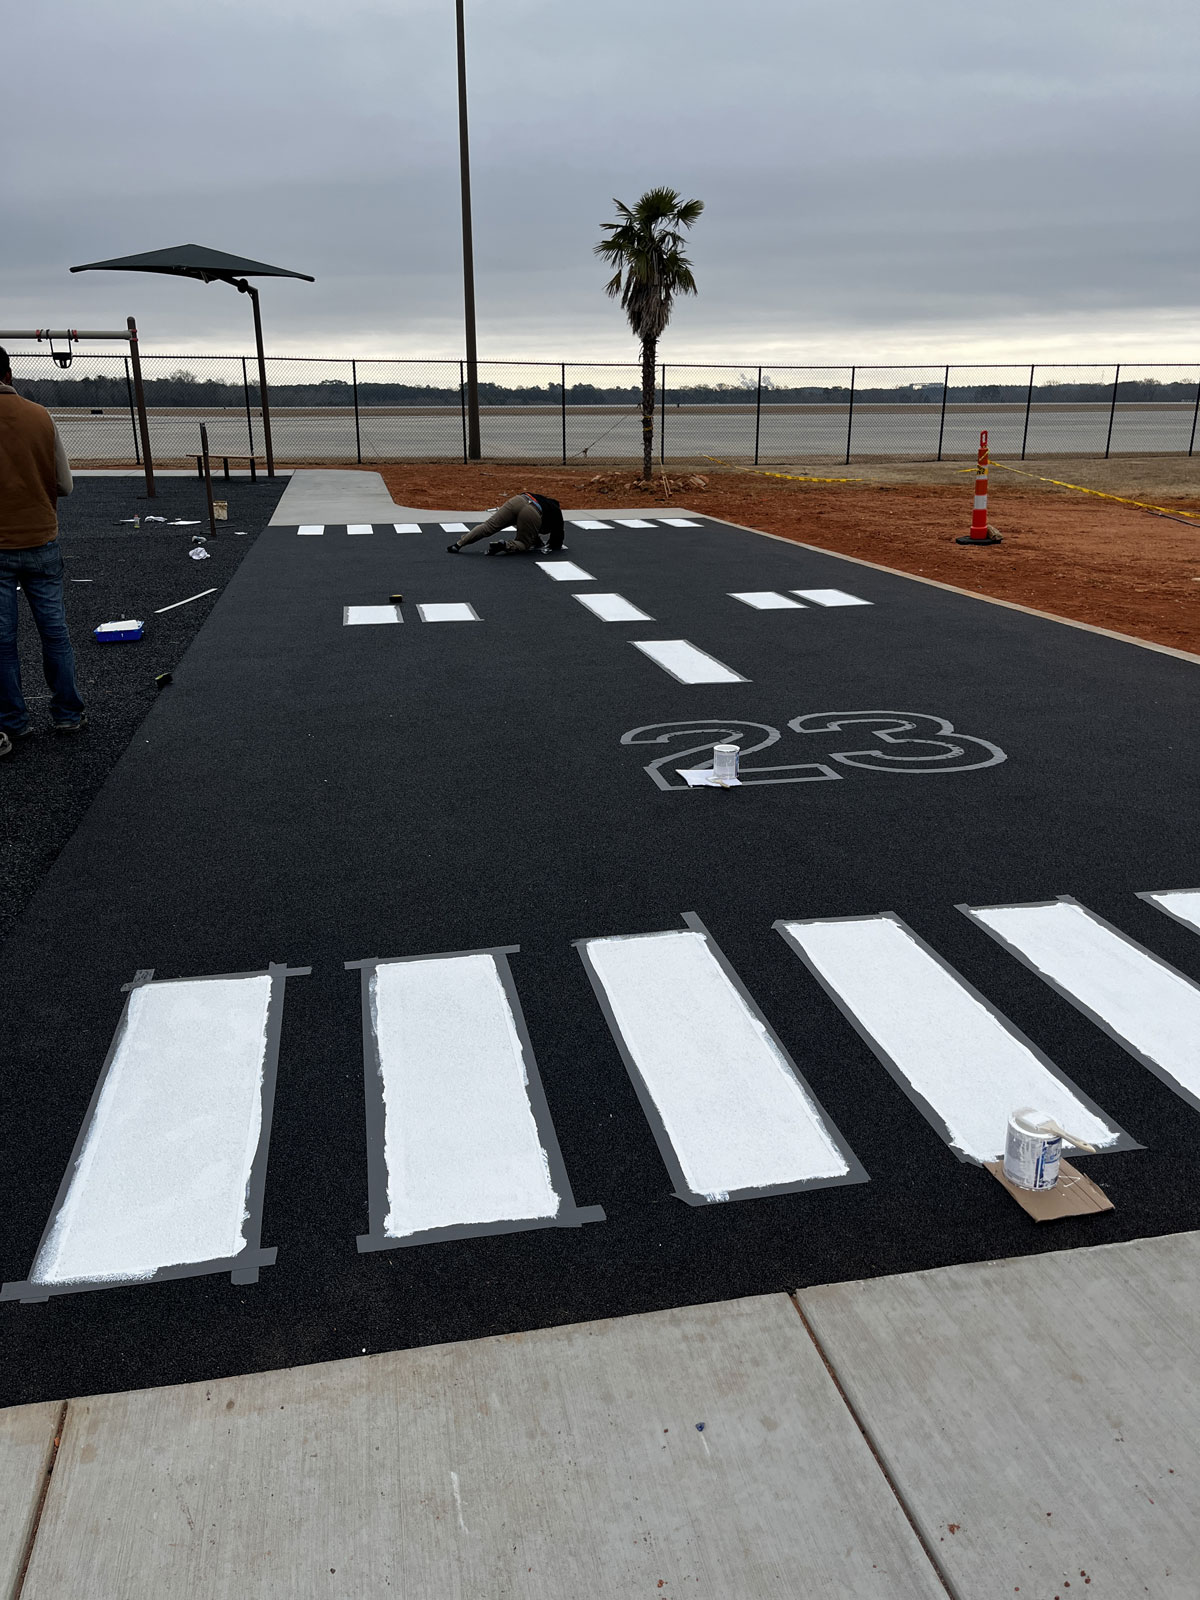
If you’re feeling creative and want to integrate patterns or colorful designs, now is your chance! Be sure to carefully blend different colored sections together using clear dividing strips or precise cut lines. Work methodically, one color at a time, keeping thickness consistent.
Allow enough curing time for your new surface to set firmly. Typically, you’ll need a minimum of 24 hours before any foot traffic. Colder temperatures or higher humidity may extend this curing time up to 48-72 hours. Your surface will be fully cured and ready for heavier use within 3-7 days, depending on conditions.
During this curing period, protect your freshly installed surface by roping off the area clearly and temporarily restricting access.
Finally, give your completed project a thorough inspection. Double-check thickness, drainage, edges, and the overall finish. Pat yourself on the back—you’ve just accomplished a fantastic rubber wetpour diy installation!
One client in Columbia, SC, shared their experience: “We’d just finished laying our surface when an unexpected weekend storm hit. Thankfully, we’d allowed a full 24 hours of curing in good weather beforehand, so the surface came through beautifully.”
For additional helpful tips on related surfacing options, you may also find our guide on how to install rubber pavers useful.
You did it! You’ve created a safe, attractive, and durable surface—one you can proudly say you installed yourself.
Maintenance and Troubleshooting for DIY Rubber Wetpour
Congrats—you’ve completed your rubber wetpour diy installation! Now, your next step is regular maintenance. Taking good care of your surface is crucial to keeping it safe, attractive, and long-lasting for years to come.

Even the best installations experience some wear and tear over time. Let’s explore some common issues you might encounter with your rubber wetpour surface and simple ways to fix them.
Common Issues with DIY Rubber Wetpour and How to Fix Them
Surface Granulation (when rubber granules start coming loose) usually happens if the binder wasn’t mixed right or has weakened due to UV exposure. At the first sign of loose granules, apply a rebinder product to stop further deterioration. To prevent this altogether, always stick to correct binder ratios and use UV-stable materials.
Cracking can occur from sub-base movement, temperature fluctuations, or improper curing. If you spot minor cracks, grab a repair kit containing matching EPDM granules and binder, and patch them up. For larger cracks, carefully cut out the damaged section, prime it, and lay a fresh patch. Thorough sub-base preparation and proper curing conditions help prevent cracking.
Edge Separation tends to happen if edges weren’t compacted well or didn’t bond correctly. If edges lift or separate, carefully cut around the affected area and install a new wetpour edge strip about 6-8 inches wide. Ensuring proper edge compaction and priming during installation will help prevent this issue.
Color Fading is common, especially with shades like blue or purple that fade faster under direct sun. To refresh faded colors, apply a specialized EPDM color refresher or consider overlaying the faded area with new granules. Selecting UV-stable EPDM granules from the start and considering sunlight exposure will help keep your colors vibrant longer.
Drainage Problems can show up as puddles due to clogged pores or an uneven slope. Regular sweeping or gentle pressure washing helps keep your surface draining well. In severe cases, a core sample might be needed to assess drainage issues. Proper slope and consistent cleaning prevent water pooling.
Moss and Algae Growth often affect shaded or damp areas. Treat these areas with a gentle, rubber-safe moss killer, and rinse thoroughly afterward. Regular cleaning and sunlight exposure help prevent moss and algae buildup.
As playground maintenance specialist Doug W. says, “Hal is an encyclopedia on all aspects of playground rubber install, repair, and maintenance. He’ll save you money by teaching you how to spot and fix little problems before they turn into big ones.”
For more tips on installation and upkeep, you might enjoy our detailed guide on installing playground tiles.
Long-Term Care for Your Wetpour Surface
Your rubber wetpour diy surface is tough and durable, but a bit of TLC goes a long way. Here’s how to keep it looking great year-round:
Make regular cleaning part of your routine. Sweep your surface weekly to clear away leaves, dirt, and debris. Monthly, give it a gentle wash with low-pressure water and a soft brush. If stubborn stains pop up, use mild detergent (skip harsh chemicals—they can damage the binder). Be sure to rinse thoroughly afterward.
Seasonal upkeep helps prevent problems down the line. In spring, give your surface a thorough cleaning after winter and look for any damage from frost or ice. Summer calls for checking UV damage, and applying protective treatments if needed. When fall leaves drop, clear them promptly to avoid buildup. During winter, use softer tools like rubber-bladed snow removers and pet-friendly ice melt, steering clear of metal tools and rock salt.
Stains are part of outdoor life, but quick action helps. For food, drink, or bird droppings, a mild detergent solution usually does the trick. Oil-based stains respond best to a rubber-safe degreaser. If a stain won’t budge, give us a shout—we have specialized products made just for rubber surfaces.
Every 2-3 years, consider resealing your wetpour surface with a specialized rubber sealer. This extra step protects against UV damage, strengthens the binder, and prolongs the life of your surface, especially in high-traffic zones like slides and swing exits.
Finally, schedule a yearly professional inspection. It doesn’t take much time, but an expert eye can spot small problems before they grow. Be sure to have critical areas like seams and edges inspected. Periodically testing your surface’s impact absorption ensures your playground remains as safe as it was the day you installed it.
One of our satisfied customers from Nashville, TN, shared this great advice: “We’ve had our DIY wetpour playground surface for over 5 years now. With regular cleaning and annual inspections, it still looks fantastic and provides the same level of safety as when it was brand new.”
Frequently Asked Questions about DIY Rubber Wetpour
As specialists in rubber wetpour diy projects, we’ve answered countless questions from customers just like you. Below, we’ve put together clear answers to the most common queries to help you confidently tackle your surfacing project.
How Long Does DIY Rubber Wetpour Last?
One of the big questions you’re probably wondering about is lifespan: just how long will your rubber wetpour diy surface stand up to playground fun, weather conditions, and everyday wear and tear?
The short (and reassuring!) answer is that a well-installed DIY surface typically lasts around 8 to 10 years—and even longer with careful maintenance. By comparison, professionally installed surfaces usually last between 10 to 15 years, largely because contractors have specialized equipment and extra experience.
That said, the lifespan of your DIY project depends on several key factors:
- Material Quality: Choosing high-quality EPDM granules and binders helps your surface hold up better over time.
- Installation Technique: Taking your time to thoroughly mix, carefully apply, and properly cure the rubber layers significantly boosts durability.
- Usage Levels: Heavily used play areas and high-traffic zones naturally wear more quickly, especially spots like under swings or slides.
- Routine Maintenance: Regular cleaning and making small repairs as soon as issues pop up will dramatically extend your surface’s life.
- Local Conditions: Harsh climates, intense sunlight (UV exposure), extreme temperature swings, or heavily shaded areas can all speed up wear.
One of our customers shared: “Our DIY wetpour surface is entering its 7th year and still performing well. We’ve only needed minor repairs in high-traffic areas like under the swings.”
With quality materials, careful installation, and regular TLC, your DIY surface can stay safe, attractive, and functional for many years to come.
Can I Install Rubber Wetpour DIY on Different Surfaces?
Absolutely! One of the great things about rubber wetpour diy is its versatility. You can install it over a wide range of base materials, provided you carefully prep each surface type.
Concrete or Asphalt: These are ideal bases because they’re stable, strong, and structurally sound. Before applying wetpour, make sure your concrete or asphalt is clean, dry, and free from cracks. Prime the surface thoroughly with polyurethane primer to ensure excellent adhesion. It’s also smart to create a keying channel around the edges to lock in the rubber layer securely. We recommend a concrete base that’s at least 100mm thick for the best results.
Compacted Stone: A compacted stone base (like MOT Type 1 crushed stone) works well too. Just make sure it’s at least 150mm thick and thoroughly compacted with a roller or plate compactor. Always use a geotextile membrane beneath to prevent weeds, and install stable edging to contain your rubber surface neatly.
Timber: A timber base can be a suitable option if the wood is pressure-treated for ground contact and thoroughly primed. Be sure it’s secured well and won’t warp over time. Drill drainage holes to avoid water pooling underneath.
Existing Surfaces: You can often overlay existing wetpour (if it’s in decent shape); however, old rubber tiles must be fully removed. Artificial grass can sometimes be covered if it’s firmly bonded. If you’re unsure, it’s smart to do a small test patch first or consult a professional.
As our industry expert advises: “The sub-base is the foundation of your wetpour system. If you’re unsure about the suitability of your existing surface, it’s worth conducting a small test area first.”
What Thickness Should My DIY Rubber Wetpour Be?
Choosing the correct thickness for your rubber wetpour diy surface is crucial for meeting safety standards and ensuring proper protection against falls.
The thickness of a wetpour surface mainly hinges on the Critical Fall Height (CFH). CFH is the tallest height from which someone (usually a child) could fall without suffering serious injury. Different playground structures have different CFH requirements, so always check the manufacturer’s guidelines or local safety regulations.
Here are general thickness recommendations based on typical fall heights:
| Fall Height | Total Wetpour Thickness | Base Layer | Top Layer |
|---|---|---|---|
| Up to 4 ft (1.2m) | 40mm | 25mm | 15mm |
| 4-5 ft (1.2-1.5m) | 50mm | 35mm | 15mm |
| 5-7 ft (1.5-2.1m) | 60mm | 45mm | 15mm |
| 7-10 ft (2.1-3m) | 80mm | 65mm | 15mm |
| 10+ ft (3m+) | 100mm+ | 85mm+ | 15mm |
Your top layer (the EPDM color granules) should always be at least 15mm thick. This layer provides UV protection, color customization, and forms the tough wear-resistant surface.
Meanwhile, your base layer of recycled SBR rubber acts as the shock absorber. The taller the potential fall height, the thicker you’ll need to make this layer to adequately protect against injuries.
As one surfacing professional explains: “For a 5-foot fall height, a two-inch (50mm) base layer usually provides enough cushioning. But always err on the side of caution, and consider testing the surface’s impact absorption after installation.”
For detailed specifics in your local area, double-check your local playground safety regulations or standards.
With the right materials, proper thickness, thoughtful surface prep, and regular maintenance, your rubber wetpour diy project will provide years of safe, colorful fun and satisfaction—right in your own backyard or community space.
Conclusion
Starting on your rubber wetpour diy project is more than just a home improvement task—it’s a rewarding journey that transforms everyday spaces into safe, vibrant, and eco-conscious environments. By carefully following the steps we’ve covered, you ensure your DIY installation will look professional and stand the test of time.
One of the best parts about choosing the rubber wetpour diy route is the incredible satisfaction you’ll gain. Not only will you create a customized, colorful playground or sports area exactly how you envision it, but you’ll also significantly cut down on costs by skipping expensive contractor fees. Imagine proudly telling your friends: “Yeah, I built it myself!” (Go ahead, brag a little—you earned it!)
Throughout your DIY journey, certain key details will make or break your project. First, always invest enough time into thorough surface preparation. As tempting as it is to rush ahead to the fun parts, careful site prep ensures your surface won’t run into issues down the line. Trust us, you’ll thank yourself later!
Choosing high-quality materials is equally important. Superior EPDM granules, durable SBR rubber, and reliable polyurethane binders make all the difference. They ensure your rubber wetpour diy surface remains vibrant, resilient, and safe for years—without constantly needing repairs.
Technique matters too. From mixing the granules and binder in the correct ratios to carefully smoothing out your surface, attention to detail is essential. As one seasoned installer shared, “the secret to a perfect finish is all in the trowel technique.” Take your time here, and your finished surface will rival a professional’s.
Once installed, caring for your rubber surface doesn’t stop. Regular cleaning and quick attention to small repairs will extend its lifespan significantly. Think of it like caring for a favorite jacket—treat it well, and it’ll serve you reliably season after season.
And let’s not forget—when it comes to playground surfaces, safety is everything. Always double-check your rubber wetpour thickness to match the critical fall heights required by your play equipment. Whether you’re installing a backyard play area in Charlotte, NC, or a school playground in Raleigh, ensuring the right depth of surfacing keeps kids safe and parents happy.
At Replay Surfacing, we’re always here to cheer you on and help you succeed. With quality advice, comprehensive DIY guides, and eco-friendly recycled rubber products, our mission is supporting your DIY trips every step of the way. Your decision to use recycled tire materials doesn’t just create amazing playgrounds and sport areas—it makes a real, positive impact on our environment.
Successfully completing a rubber wetpour DIY project is not just about following steps — it is about approaching every phase with purpose and care. When you invest time in thoughtful planning, correct mixing ratios, and proper curing, the result is a surface that not only performs well but also reflects your craftsmanship. This process empowers you to create a safe, resilient area that will serve your family or community for years, without being reliant on professional installers.
Feeling inspired? Visit our dedicated playground Surfacing resource page for more helpful installation guides and surfacing tips.
The perfect playground or sports surface isn’t all about picking colors or patterns—it’s about the care, patience, and enthusiasm you pour into every step along the way. With your creativity and commitment, your rubber wetpour diy installation won’t just be another home improvement—it’ll be an enjoyable experience, a source of pride, and a safe, beautiful space for your community to enjoy for many years.